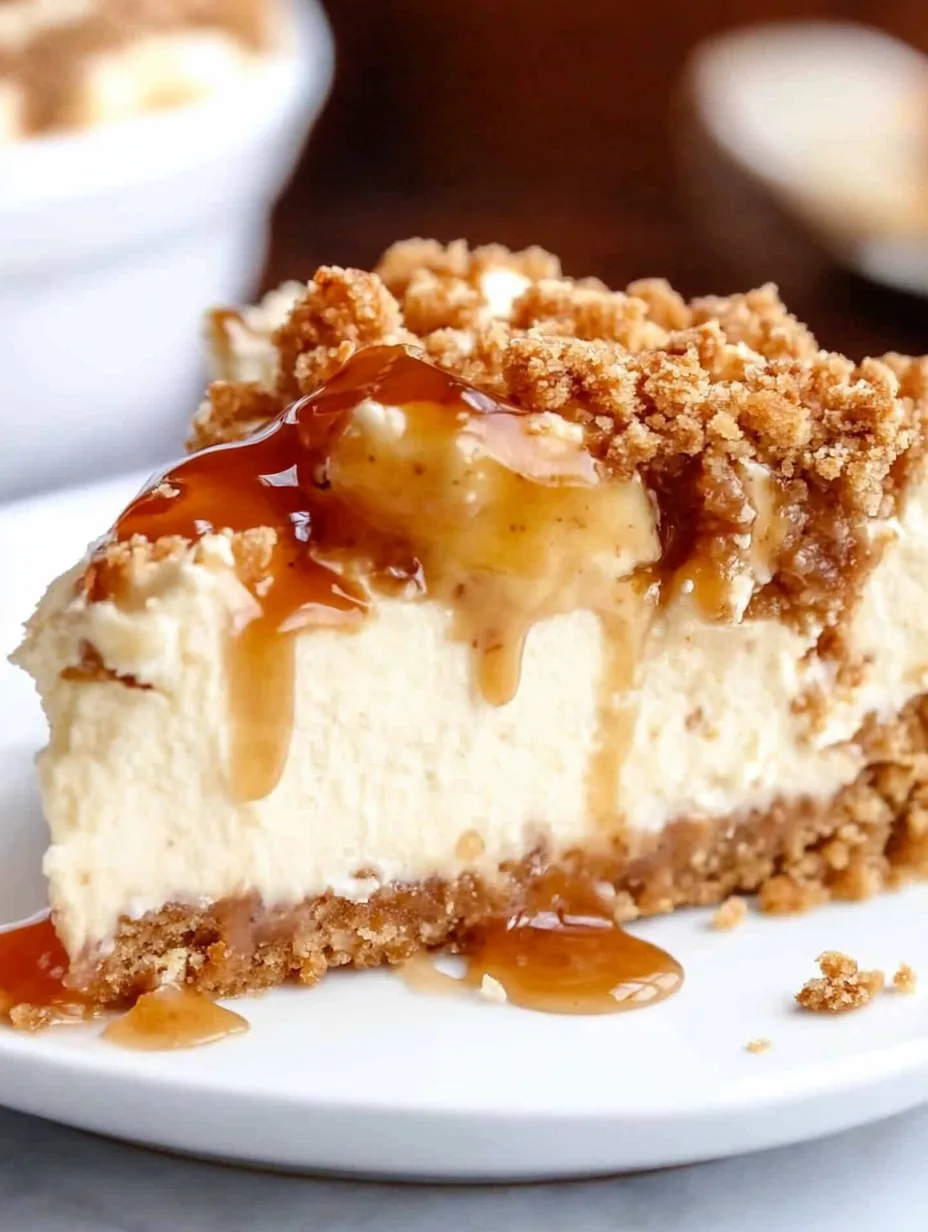

Apple Crisp Cheesecake is a delightful fusion of two classic desserts that brings together a rich, creamy cheesecake and the comforting flavors of apple crisp. This dessert is an amazing treat that balances the tanginess of cream cheese and the sweetness of apples topped with a crunchy, spiced oat topping. The first bite transports you to autumn, evoking memories of warm apple pie fresh from the oven. Perfect for gatherings or a cozy night in, this cheesecake has a unique charm that draws everyone in.
If you’ve never tried Apple Crisp Cheesecake, you’re in for a sweet surprise. Each layer offers a burst of flavor, with the creamy filling harmonizing beautifully with the cinnamon-spiced apples and crumbly topping. It’s a dessert that is not only satisfying but also visually stunning, making it an excellent centerpiece for any occasion. Whether you’re a baking novice or a seasoned pro, the incredible taste of this cheesecake makes it worth the effort. Let’s explore what makes this recipe so special and why it should be on your dessert roster.
This guide will walk you through the reasons you’ll love this recipe, the preparation and cooking time, the necessary ingredients, step-by-step instructions, and how to serve this show-stopping dessert. So, dust off those mixing bowls and let’s get started on creating an Apple Crisp Cheesecake that will wow your friends and family!
Why You’ll Love This Recipe
Apple Crisp Cheesecake is a unique and delectable dessert that combines the best of both worlds. Here are several reasons why this recipe stands out:
1. Flavor Combination: The harmonious blend of sweet and tangy flavors tantalizes your taste buds, offering the essence of both cheesecake and apple crisp in every bite.
2. Texture Contrast: The creamy filling contrasts beautifully with the crisp apples and crunchy topping, making each mouthful exciting.
3. Seasonal Appeal: Loaded with spices and flavors reminiscent of fall, this cheesecake is perfect for serving during the autumn season, though it can be enjoyed year-round.
4. Ideal for Gatherings: This dessert acts as an icebreaker at parties, drawing anyone within sniffing distance to its enticing aroma and beautiful presentation.
5. Satisfies a Variety of Cravings: It combines the creamy richness of cheesecake, the juicy goodness of baked apples, and the comforting crunch of oatmeal to satisfy diverse cravings.
6. Versatile Serving Options: It can be served alone or topped with whipped cream, caramel sauce, or ice cream, allowing you to customize each serving.
Each of these elements adds to the allure of Apple Crisp Cheesecake, ensuring it becomes a favorite among your family and friends.
Preparation and Cooking Time
Creating the Apple Crisp Cheesecake is a thoughtful process that culminates in an impressive dessert. Here’s a quick breakdown of the time you’ll need:
– Preparation Time: 30 minutes
– Cooking Time: 60 minutes
– Cooling Time: 4 hours (or overnight for best results)
These times may vary slightly depending on your baking experience and oven performance, but this outline provides a good framework for planning your baking session.
Ingredients
– For the Cheesecake:
– 2 cups cream cheese, softened
– 1 cup granulated sugar
– 1 teaspoon vanilla extract
– 3 large eggs
– 1 cup sour cream
– 2 tablespoons all-purpose flour
– For the Apple Filling:
– 4 medium apples, peeled and diced
– 1 tablespoon lemon juice
– 1 teaspoon cinnamon
– ¼ teaspoon nutmeg
– ½ cup brown sugar
– For the Crisp Topping:
– 1 cup rolled oats
– ½ cup all-purpose flour
– ½ cup brown sugar
– ½ teaspoon cinnamon
– ¼ cup unsalted butter, melted
– Pinch of salt
Step-by-Step Instructions

Creating the Apple Crisp Cheesecake can be done effortlessly by following these straightforward steps:
1. Preheat the Oven: Preheat your oven to 325°F (160°C). Grease a 9-inch springform pan.
2. Prepare the Apple Filling: In a bowl, mix the diced apples with lemon juice, cinnamon, nutmeg, and brown sugar. Set aside to let the flavors mingle.
3. Make the Cheesecake Batter: In a large mixing bowl, beat the softened cream cheese until smooth. Gradually add the granulated sugar and vanilla, mixing well.
4. Add Eggs and Sour Cream: Add the eggs one at a time, mixing on low speed. Then, fold in the sour cream and flour until just combined.
5. Layer the Apples: Spread half of the cheesecake batter into the bottom of the prepared springform pan. Evenly distribute the apple filling over the batter, then pour the remaining cheesecake batter on top.
6. Prepare the Crisp Topping: In another bowl, combine rolled oats, flour, brown sugar, cinnamon, and a pinch of salt. Drizzle melted butter over the mixture and stir until well combined. Sprinkle the topping over the cheesecake layer.
7. Bake: Place the springform pan in the preheated oven and bake for 55-60 minutes, or until the edges are set and the center slightly jiggles.
8. Cool the Cheesecake: Once baked, turn off the oven and leave the cheesecake inside for about an hour to cool gradually. Then, remove it from the oven and let it cool completely on a wire rack.
9. Refrigerate: Once cooled, cover the cheesecake and refrigerate for at least 4 hours, preferably overnight. This allows the flavors to meld perfectly.
10. Serve: Before serving, run a knife around the edge of the springform pan to loosen the cheesecake. Carefully remove the sides of the pan.
How to Serve
Serving Apple Crisp Cheesecake allows you to showcase its beauty and flavor, making it memorable for your guests. Here are tips on how to serve:
1. Presentation: Use a cake stand or decorative platter to display the cheesecake. A simple design can enhance its visual appeal.
2. Accompaniments: Consider serving with a dollop of whipped cream or a drizzle of caramel sauce to elevate the experience.
3. Fresh Garnishes: Adding a sprinkle of cinnamon or chopped nuts on top can add visual interest and flavor.
4. Slice Size: Cut generous slices, but not too large. This encourages guests to try a second piece!
5. Beverage Pairing: Pair with coffee, hot apple cider, or sweet dessert wine for a complete, delightful experience.
In doing so, you can ensure that this Apple Crisp Cheesecake steals the spotlight at your next dessert table!
Additional Tips
– Use Fresh Apples: For the best flavor, choose tart apples like Granny Smith or Honeycrisp. These varieties keep their shape and provide a lovely tartness against the cheesecake’s sweetness.
– Let It Chill: Allow the cheesecake to cool completely before refrigerating. This helps the flavors meld together and results in a creamier texture.
– Experiment with Spices: Feel free to add a pinch of allspice or ginger to the apple filling for an extra kick.
Recipe Variation
Get creative with this Apple Crisp Cheesecake! Here are a few variations to consider:
1. Caramel Swirls: Drizzle caramel sauce into the cheesecake batter before baking for a decadent touch.
2. Gluten-Free Crust: Replace the all-purpose flour in the crust with gluten-free flour or ground almonds to cater to gluten sensitivities.
3. Mixed Fruits: Substitute half the apples with pears or other fruits to create a mixed fruit cheesecake experience.
Freezing and Storage
– Storage: Keep the Apple Crisp Cheesecake covered in the refrigerator. It will maintain its flavor and texture for up to one week.
– Freezing: You can freeze the cheesecake for up to 2-3 months. Wrap individual slices tightly in plastic wrap, then place them in an airtight container.
Special Equipment
To create a perfect Apple Crisp Cheesecake, you will need a few essential tools:
– 9-inch springform pan
– Mixing bowls
– Electric mixer or whisk
– Peeler and knife for the apples
– Measuring cups and spoons
Frequently Asked Questions
Can I use a different type of cheese?
Yes, you can substitute mascarpone for a creamier texture or ricotta for a lighter profile.
What if my cheesecake cracks during baking?
This can happen due to temperature changes. To prevent cracking, ensure the oven temperature remains stable and avoid opening the oven door too frequently.
Can I make this cheesecake in advance?
Absolutely! The cheesecake can be made up to two days in advance, allowing time for flavors to develop.
Is it possible to make a mini version?
Yes, you can use ramekins or a smaller springform pan. Just adjust the baking time accordingly.
What should I serve with it?
Whipped cream, vanilla ice cream, or a drizzle of caramel complement the cheesecake beautifully.
Conclusion
Apple Crisp Cheesecake is not just a dessert; it’s an experience that combines creamy richness with comforting spice. This recipe is perfect for any gathering or a special treat for yourself. The layers of flavor, texture, and warmth make it irresistible. Once you serve it, you’ll certainly leave your guests asking for seconds!
Apple Crisp Cheesecake: An Incredible Ultimate Recipe
- Prep Time: 30 minutes
- Cook Time: 60 minutes
- Total Time: 1 hour 30 minutes
Ingredients
– For the Cheesecake:
– 2 cups cream cheese, softened
– 1 cup granulated sugar
– 1 teaspoon vanilla extract
– 3 large eggs
– 1 cup sour cream
– 2 tablespoons all-purpose flour
– For the Apple Filling:
– 4 medium apples, peeled and diced
– 1 tablespoon lemon juice
– 1 teaspoon cinnamon
– ¼ teaspoon nutmeg
– ½ cup brown sugar
– For the Crisp Topping:
– 1 cup rolled oats
– ½ cup all-purpose flour
– ½ cup brown sugar
– ½ teaspoon cinnamon
– ¼ cup unsalted butter, melted
– Pinch of salt
Instructions
Creating the Apple Crisp Cheesecake can be done effortlessly by following these straightforward steps:
1. Preheat the Oven: Preheat your oven to 325°F (160°C). Grease a 9-inch springform pan.
2. Prepare the Apple Filling: In a bowl, mix the diced apples with lemon juice, cinnamon, nutmeg, and brown sugar. Set aside to let the flavors mingle.
3. Make the Cheesecake Batter: In a large mixing bowl, beat the softened cream cheese until smooth. Gradually add the granulated sugar and vanilla, mixing well.
4. Add Eggs and Sour Cream: Add the eggs one at a time, mixing on low speed. Then, fold in the sour cream and flour until just combined.
5. Layer the Apples: Spread half of the cheesecake batter into the bottom of the prepared springform pan. Evenly distribute the apple filling over the batter, then pour the remaining cheesecake batter on top.
6. Prepare the Crisp Topping: In another bowl, combine rolled oats, flour, brown sugar, cinnamon, and a pinch of salt. Drizzle melted butter over the mixture and stir until well combined. Sprinkle the topping over the cheesecake layer.
7. Bake: Place the springform pan in the preheated oven and bake for 55-60 minutes, or until the edges are set and the center slightly jiggles.
8. Cool the Cheesecake: Once baked, turn off the oven and leave the cheesecake inside for about an hour to cool gradually. Then, remove it from the oven and let it cool completely on a wire rack.
9. Refrigerate: Once cooled, cover the cheesecake and refrigerate for at least 4 hours, preferably overnight. This allows the flavors to meld perfectly.
10. Serve: Before serving, run a knife around the edge of the springform pan to loosen the cheesecake. Carefully remove the sides of the pan.
Nutrition
- Serving Size: 12 slices
- Calories: 320 kcal
- Fat: 15g
- Protein: 5g