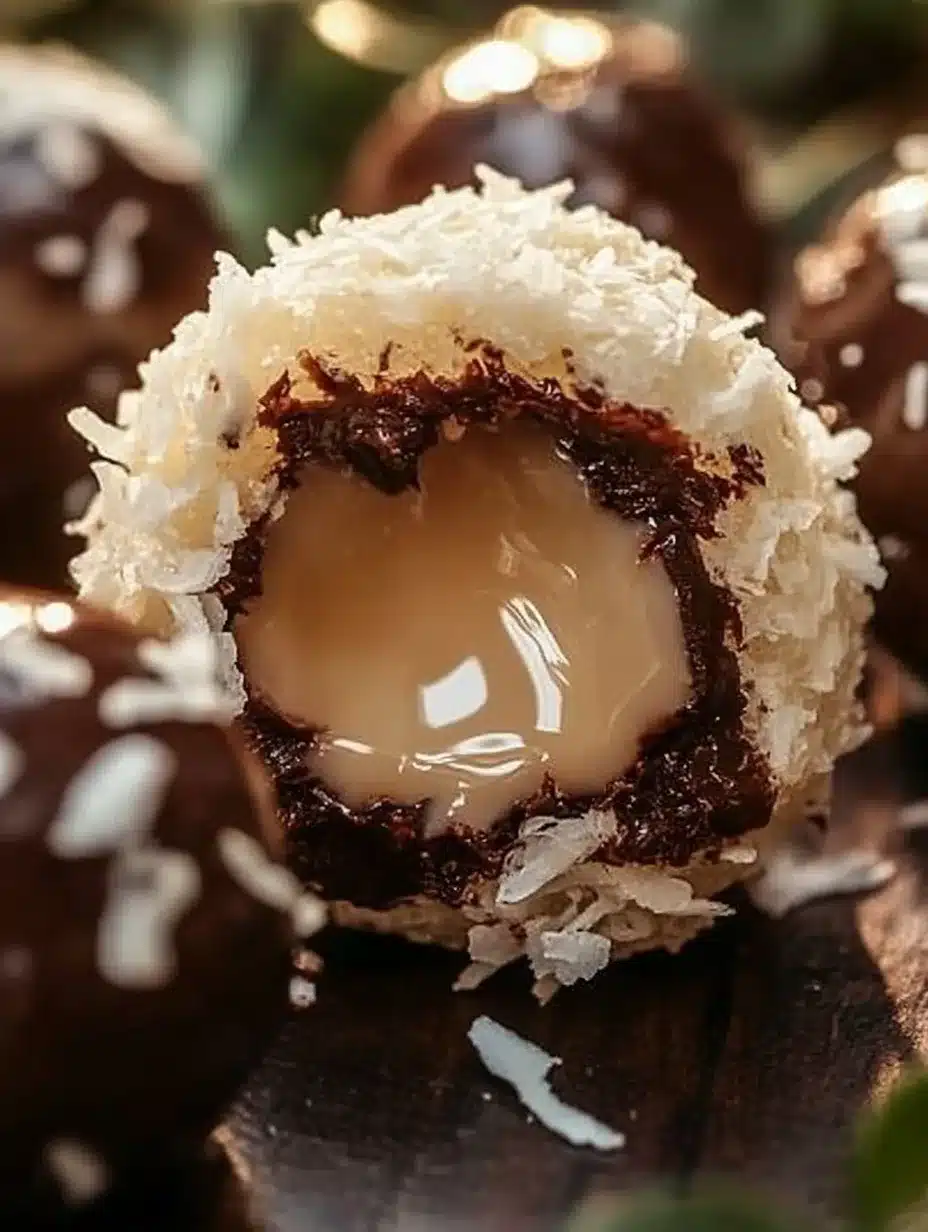
Chocolate Coconut Bliss Balls are an amazing treat that combines the richness of chocolate with the tropical flair of coconut. These energy-packed bites are perfect for anyone looking to satisfy their sweet tooth while staying healthy. Loaded with wholesome ingredients, they make for a delightful snack or dessert that feels indulgent yet guilt-free. If you’re looking for a quick recipe that doesn’t compromise on taste, you’ve found the right one.
Imagine biting into a small ball of chocolatey goodness, with a chewy coconut texture that transports you to a warm beach, even on the dreariest of days. That’s the bliss you’ll experience with every bite of these delicious treats. Not only are they incredibly easy to make, but they’re also versatile and customizable. Whether you want to enjoy them as a pre-workout snack or a post-dinner dessert, Chocolate Coconut Bliss Balls will elevate any moment.
In this guide, you’ll discover why this recipe is a hit among health enthusiasts and chocolate lovers alike. We’re not just talking about taste here; these bliss balls bring a harmony of texture and flavor that’s hard to resist. Plus, they’re made using simple, readily available ingredients. So, let’s dive into why you’ll love this recipe and how to make it!
Why You’ll Love This Recipe
Chocolate Coconut Bliss Balls are a perfect blend of health and indulgence, making them an irresistible treat. Here are a few reasons why this recipe will quickly become a favorite among you and your loved ones:
1. Quick and Easy: With minimal preparation time and no baking required, these bliss balls are ready in no time.
2. Healthy Ingredients: Made with natural ingredients, they offer a nutritious bite without sacrificing flavor.
3. Perfect for All Occasions: Whether you’re hosting a party or need a snack for a busy day, these bliss balls fit the bill.
4. Customizable: Add your favorite nuts, seeds, or nut butters to make them uniquely yours.
5. Kid-Friendly: They are a great way to sneak in some nutrition for picky eaters.
6. Energy Boost: These bliss balls are packed with healthy fats and proteins, making them a great energy source.
When you experience the combination of rich chocolate and delightful coconut, you’ll understand why these bliss balls are often referred to as “bliss”!
Preparation and Cooking Time
Making Chocolate Coconut Bliss Balls is a quick endeavor that barely takes any time at all. Here’s the breakdown of the total time required:
– Preparation Time: 10 minutes
– Chilling Time: 30 minutes
– Total Time: 40 minutes
Whether you’re in a rush or simply want to indulge in something sweet, this recipe accommodates your busy lifestyle.
Ingredients
– 1 cup rolled oats
– 1 cup unsweetened shredded coconut
– 1/2 cup natural almond butter (or any nut butter)
– 1/3 cup honey or maple syrup
– 1/4 cup cocoa powder
– 1 teaspoon vanilla extract
– A pinch of salt
– Optional toppings: extra shredded coconut, chopped nuts, or cocoa powder
Step-by-Step Instructions
Creating Chocolate Coconut Bliss Balls is straightforward and fun! Follow these simple steps to whip up your batch:
1. Combine Dry Ingredients: In a mixing bowl, combine rolled oats, shredded coconut, cocoa powder, and a pinch of salt.
2. Add Wet Ingredients: Add almond butter, honey or maple syrup, and vanilla extract to the dry mixture.
3. Mix Thoroughly: Stir the mixture using a spatula or your hands until everything is well combined and forms a sticky dough.
4. Chill the Mixture: Cover the bowl and place it in the refrigerator for about 30 minutes. This will make the mixture firmer and easier to roll.
5. Form Balls: Once chilled, take a small amount of the mixture (about one tablespoon) and roll it into a ball using your hands. Repeat until all the mixture is formed into balls.
6. Add Toppings (Optional): Roll the balls in additional shredded coconut, chopped nuts, or cocoa powder for an extra burst of flavor.
7. Store: Place the bliss balls in an airtight container. They can be stored in the refrigerator for up to a week or frozen for longer shelf life.
These easy steps will guide you to creating blissful bites that are sure to impress!
How to Serve
Presenting your Chocolate Coconut Bliss Balls in a delightful way can enhance the experience for you and your guests. Consider the following serving ideas:
1. On a Platter: Arrange the bliss balls on a decorative plate or a tiered stand for a visually appealing presentation.
2. Snack Packs: For on-the-go convenience, pack them into small, portable containers or snack bags.
3. Dipping Sauce: Serve with a side of melted dark chocolate or a dollop of nut butter for an interactive dessert.
4. Garnish: Top with a sprinkle of sea salt or drizzled chocolate to make them even more appetizing.
5. Pair with Beverages: Serve alongside herbal tea, coffee, or a smoothie for a delicious snack.
By following these serving tips, you’ll create an inviting setup that makes enjoying Chocolate Coconut Bliss Balls even more enjoyable. With their rich flavor and beautiful presentation, these treats are bound to leave a lasting impression!
Additional Tips
– Use Fresh Ingredients: For the best taste, always use fresh, high-quality coconut and cocoa powder.
– Experiment with Sweeteners: If you prefer, try alternative sweeteners like agave syrup or stevia for a low-glycemic option.
– Enhance Flavor: A dash of espresso powder can intensify the chocolate flavor without adding extra sweetness.
– Chill Longer: For an even firmer texture, consider chilling the bliss balls for a longer time before rolling.
– Make a Family Activity: Get kids involved in rolling the balls; it’s a fun way to spend time together and make cooking a family event.
Recipe Variation
Feel free to customize your Chocolate Coconut Bliss Balls to suit your taste preferences!
1. Nut-Free Alternative: Replace almond butter with sun butter for a nut-free version that is equally delicious.
2. Fruit Fusion: Mix in chopped dried fruits like apricots, dates, or cranberries for added sweetness and texture.
3. Protein Boost: Add your favorite protein powder to increase the nutritional value and keep you fuller longer.
4. Flavor Twists: Experiment with other extracts such as almond or coconut extract for a unique flavor profile.
5. Spicy Kick: A pinch of cayenne pepper can add warmth and contrast to the sweetness of coconut and chocolate.
Freezing and Storage
– Storage: Keep your bliss balls in an airtight container in the refrigerator. They typically last about a week.
– Freezing: For longer storage, freeze the bliss balls in a single layer on a baking sheet. Once frozen solid, transfer them to an airtight container or freezer bag. They can be frozen for up to three months.
Special Equipment
Preparation of Chocolate Coconut Bliss Balls requires minimal tools, making them even more convenient. You will need:
– Mixing Bowls: For combining ingredients.
– A Spatula: Ideal for mixing and scraping down the sides of the bowl.
– Measuring Cups and Spoons: For accurate measurements of ingredients.
– Small Baking Sheet: Useful for freezing the balls before storing.
– Airtight Container: To store the bliss balls and keep them fresh.
Frequently Asked Questions
Can I use sweetened shredded coconut?
Yes, but this will alter the sweetness level of your bliss balls. You may want to adjust the amount of honey or maple syrup accordingly.
How do I know if my bliss balls are firm enough?
They should hold their shape when rolled. If they seem too sticky, refrigerate them longer or add a bit more oats.
Can I substitute the cocoa powder?
Absolutely! Carob powder is a great alternative if you want to avoid chocolate altogether.
What if I don’t have almond butter?
You can use any nut butter or even sun butter for a nut-free version.
Are these bliss balls suitable for a gluten-free diet?
Yes! All ingredients listed are gluten-free, making them a safe choice for gluten-sensitive individuals.
Conclusion
Chocolate Coconut Bliss Balls are not just a tasty treat; they’re a nutritious snack that’s perfect for any occasion. With their ease of preparation and versatility, these bliss balls can meet everyone’s dietary needs and preferences. Enjoy making these delightful bites, and feel free to explore the various options available to customize them to your liking!
Chocolate Coconut Bliss Balls: An Incredible Ultimate Recipe for 10
- Prep Time: 15 minutes
- Cook Time: Total Time: 45 minutes
- Total Time: 0 hours
Ingredients
– 1 cup rolled oats
– 1 cup unsweetened shredded coconut
– 1/2 cup natural almond butter (or any nut butter)
– 1/3 cup honey or maple syrup
– 1/4 cup cocoa powder
– 1 teaspoon vanilla extract
– A pinch of salt
– Optional toppings: extra shredded coconut, chopped nuts, or cocoa powder
Instructions
Creating Chocolate Coconut Bliss Balls is straightforward and fun! Follow these simple steps to whip up your batch:
1. Combine Dry Ingredients: In a mixing bowl, combine rolled oats, shredded coconut, cocoa powder, and a pinch of salt.
2. Add Wet Ingredients: Add almond butter, honey or maple syrup, and vanilla extract to the dry mixture.
3. Mix Thoroughly: Stir the mixture using a spatula or your hands until everything is well combined and forms a sticky dough.
4. Chill the Mixture: Cover the bowl and place it in the refrigerator for about 30 minutes. This will make the mixture firmer and easier to roll.
5. Form Balls: Once chilled, take a small amount of the mixture (about one tablespoon) and roll it into a ball using your hands. Repeat until all the mixture is formed into balls.
6. Add Toppings (Optional): Roll the balls in additional shredded coconut, chopped nuts, or cocoa powder for an extra burst of flavor.
7. Store: Place the bliss balls in an airtight container. They can be stored in the refrigerator for up to a week or frozen for longer shelf life.
These easy steps will guide you to creating blissful bites that are sure to impress!
Nutrition
- Serving Size: 10 balls
- Calories: 120 kcal
- Fat: 7g
- Protein: 3g

