
Classic Pumpkin Scones are a delightful way to usher in the autumn season. These delectable scones perfectly blend the flavors of pumpkin, warm spices, and a hint of sweetness, making them an irresistible treat any time of the day. Whether enjoyed with a cup of coffee in the morning or as an afternoon snack, these scones encapsulate the cozy essence of fall. With their flaky texture and rich flavors, they are sure to impress friends and family alike.
If you’re a fan of pumpkin flavored treats, you’re going to adore these scones. They create a lovely aroma while baking, drawing everyone into the kitchen with scents reminiscent of family gatherings and festive occasions. Imagine the look of delight on your loved ones’ faces as they take their first bite. The combination of pumpkin and spices is not just comforting; it’s also a celebration of seasonal ingredients.
In this guide, you’ll discover why Classic Pumpkin Scones should be your new go-to recipe. We will cover the delicious reasons to make them, the time required, the list of essential ingredients, the step-by-step instructions, and some delightful serving suggestions. This recipe is designed for both novice and experienced bakers, allowing everyone to experience the joy of making these amazing scones. Let’s get into the heart of this delicious recipe!
Why You’ll Love This Recipe
When it comes to baked goods, there are many reasons why you’ll fall head over heels for Classic Pumpkin Scones. Here are the standout features that make this recipe so special:
1. Simple Ingredients: Most of the ingredients are pantry staples, making it easy to whip these scones up on a whim.
2. Perfect for Fall: These scones encapsulate the flavors of autumn, bringing warmth and comfort with each bite.
3. Versatile Flavors: You can easily customize them by adding chocolate chips or nuts, tailoring them to your preferences.
4. Quick Preparation: The recipe is straightforward, with minimal prep time needed, letting you enjoy freshly baked scones in no time.
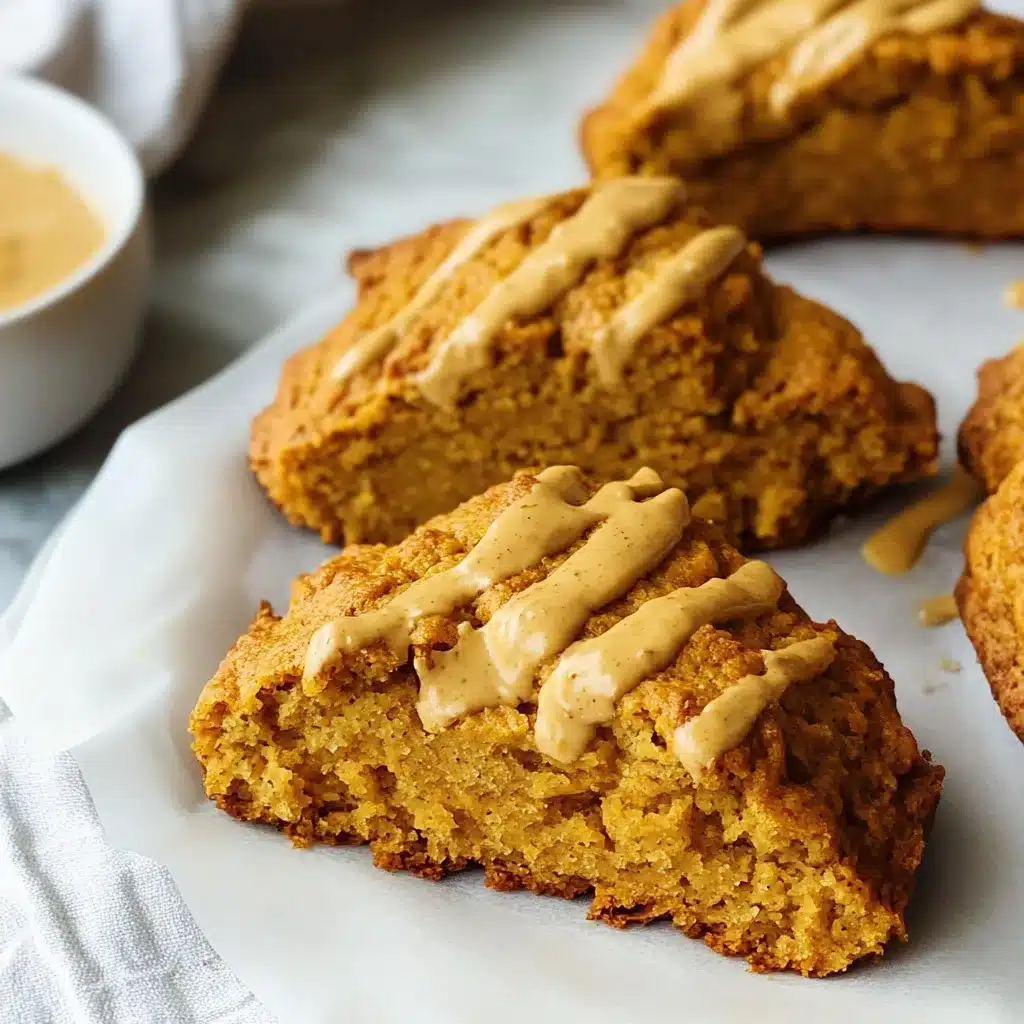
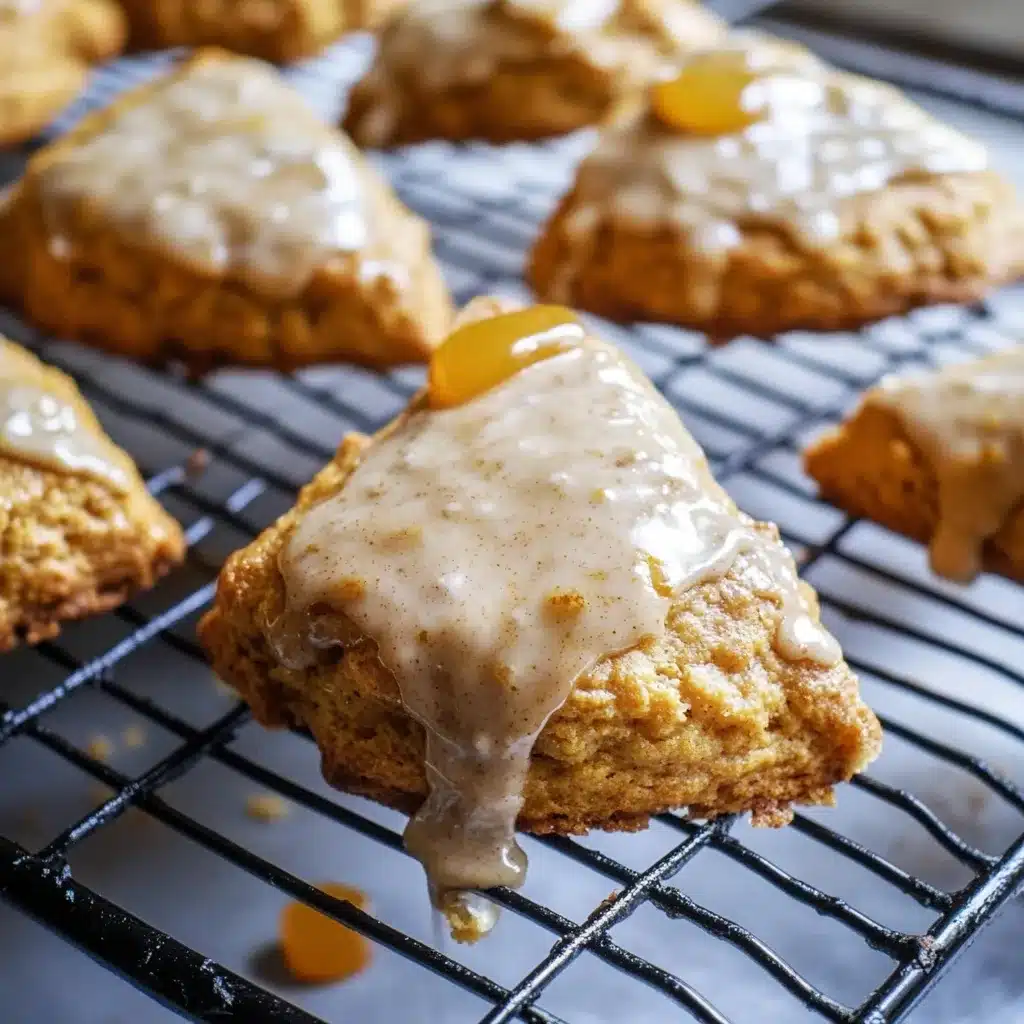
5. Impressive Presentation: With their golden-brown exterior and tempting glaze, these scones are as beautiful as they are delicious.
6. Delightful with Beverages: They pair wonderfully with coffee, tea, or even hot chocolate, making them perfect for gatherings.
These charming attributes make Classic Pumpkin Scones a likely favorite in your household. Each bite will leave you and those you serve with a lovely feeling of joy.
Preparation and Cooking Time
Classic Pumpkin Scones can be prepared and baked in roughly 45 minutes. Here’s a breakdown of the time needed:
– Preparation Time: 15 minutes
– Cooking Time: 25-30 minutes
– Cooling Time: 5-10 minutes
These times are approximate and may vary based on your kitchen experience. Nonetheless, this efficient timeframe means you can enjoy freshly baked scones with minimal effort!
Ingredients
– 2 cups all-purpose flour
– ½ cup granulated sugar
– 1 tablespoon baking powder
– 1 teaspoon ground cinnamon
– ½ teaspoon ground nutmeg
– ½ teaspoon ground ginger
– ¼ teaspoon ground cloves
– ½ teaspoon salt
– ½ cup cold unsalted butter, cubed
– ¾ cup canned pumpkin puree
– ½ cup heavy cream
– 1 large egg
– 1 teaspoon vanilla extract
– Optional: ½ cup chocolate chips or chopped nuts
– Optional glaze: 1 cup powdered sugar, 1-2 tablespoons milk
Step-by-Step Instructions

Making Classic Pumpkin Scones is an easy and enjoyable process. Follow these detailed steps for perfect results:
1. Preheat the Oven: Preheat your oven to 400°F (200°C) and line a baking sheet with parchment paper.
2. Combine Dry Ingredients: In a large bowl, whisk together the flour, granulated sugar, baking powder, cinnamon, nutmeg, ginger, cloves, and salt.
3. Cut in Butter: Add the cold cubed butter into the dry ingredients. Use a pastry cutter or your fingers to blend until the mixture resembles coarse crumbs.
4. Mix Wet Ingredients: In another bowl, combine the canned pumpkin puree, heavy cream, egg, and vanilla extract. Whisk until smooth.
5. Combine Mixtures: Create a well in the center of the dry ingredients, and pour the wet mixture into it. Stir gently until just combined; avoid overmixing.
6. Fold in Extras (if desired): If you’re adding chocolate chips or nuts, gently fold them into the dough.
7. Shape the Dough: Turn the dough out onto a lightly floured surface and shape it into a disc about 1 inch thick. Cut into wedges or use a round cutter for shapes.
8. Transfer to Baking Sheet: Place the scones on the prepared baking sheet, spacing them about 2 inches apart.
9. Bake: Bake in the preheated oven for 25-30 minutes or until golden brown. A toothpick should come out clean when inserted into the center.
10. Cool: Remove from the oven and let cool on the baking sheet for 5-10 minutes before transferring to a wire rack.
11. Prepare the Glaze (optional): In a small bowl, mix powdered sugar with milk until you achieve a smooth consistency. Drizzle over cooled scones.
These straightforward steps lead to amazing scones that are sure to please everyone!
How to Serve
When it comes to serving your Classic Pumpkin Scones, consider the following tips:
1. Presentation Matters: Arrange the scones on a decorative platter or cake stand for an inviting display.
2. Accompany with Beverages: Serve with a flavorful tea or coffee. Flavored lattes also provide a nice touch.
3. Pair with Spreads: Offer butter, cream cheese, or a spiced spread on the side for added flavor and creaminess.
4. Add Seasonal Decor: For a cozy autumn feel, decorate the serving area with small pumpkins or fall leaves.
5. Warm Them Up: A quick reheat in the oven for a few minutes can enhance their flavor and texture before serving.
By considering these serving tips, you elevate the experience of enjoying these delightful scones, making them memorable for you and your guests. Enjoy your baking adventure with Classic Pumpkin Scones!
Additional Tips
– Use Fresh Pumpkin: For an extra flavorful twist, consider using fresh pumpkin puree instead of canned. Roast your pumpkin for a richer taste.
– Check for Doneness: Ensure scones are golden-brown and a toothpick inserted in the center comes out clean. This guarantees a perfectly baked scone.
– Experiment with Spices: Add a dash of allspice or cardamom for a unique flavor profile that still stays true to the fall theme.
– Adjust Sweetness: Taste the dough before baking and adjust sugar levels according to your preference. Some may prefer a sweeter scone, while others might enjoy a more savory version.
Recipe Variation
Feel free to explore these delightful variations of Classic Pumpkin Scones:
1. Gluten-Free Option: Substitute all-purpose flour with a gluten-free flour blend. This allows those with gluten sensitivities to enjoy the recipe too.
2. Fruity Addition: Add ½ cup of dried cranberries or raisins to the dough for a fruity note that complements the pumpkin’s flavor.
3. Spiced Glaze: Instead of a traditional glaze, mix in a pinch of cinnamon and nutmeg into the powdered sugar and milk for a spiced glaze variation.
4. Savory Twist: Omit the sugar and add cheddar cheese and chopped chives for a savory version that pairs beautifully with soups.
Freezing and Storage
– Storage: Keep Classic Pumpkin Scones in an airtight container at room temperature for up to three days. This helps maintain their freshness without refrigeration.
– Freezing: For longer storage, you can freeze the baked and cooled scones. Wrap them tightly in plastic wrap and place them in a freezer bag. They can last for about two months.
– Reheating: To enjoy them after freezing, thaw at room temperature and reheat in the oven at 350°F for about 10 minutes or until warm.
Special Equipment
To make Classic Pumpkin Scones, you’ll need some basic kitchen essentials, including:
– Mixing bowls for dry and wet ingredients
– A pastry cutter or fork for cutting in the butter
– A whisk for blending wet ingredients smoothly
– A baking sheet lined with parchment paper for easy removal
– A sharp knife or pizza cutter for slicing the dough into wedges
Frequently Asked Questions
Can I use store-bought pumpkin pie filling instead of pumpkin puree?
It’s best to use plain pumpkin puree. Store-bought pumpkin pie filling contains added sweeteners and spices that may alter the scone’s flavor.
Are these scones suitable for breakfast?
Absolutely! Classic Pumpkin Scones make for a delicious and wholesome breakfast option, especially when paired with your favorite beverages.
Can I make the dough in advance?
Yes! You can prepare the dough a day in advance, wrap it tightly, and keep it in the refrigerator. Just remember to let it come to room temperature before shaping.
Is it okay to skip the glaze?
Definitely! The scones are delicious on their own without the glaze. You can enjoy them plain or with your favorite spread.
What’s the best way to transport the scones?
Use a sturdy container lined with parchment paper to avoid sticking. It helps to separate layers with more parchment if stacking is needed.
Conclusion
Crafting Classic Pumpkin Scones is a delightful way to celebrate the flavors of fall. Their warm spices and inviting aroma make them a perfect treat for gatherings or quiet moments at home. Whether you add a sweet glaze, serve them with butter, or enjoy them plain, these scones promise to bring joy. With this comprehensive guide, you’re well-equipped to bake, customize, and serve these delicious scones. Embrace the warm flavors of autumn and enjoy sharing them with family and friends!
Classic Pumpkin Scones: The Ultimate Amazing Recipe You Need to Try

- Prep Time: 15 minutes
- Cook Time: 25-30 minutes
- Total Time: 0 hours
Ingredients
– 2 cups all-purpose flour
– ½ cup granulated sugar
– 1 tablespoon baking powder
– 1 teaspoon ground cinnamon
– ½ teaspoon ground nutmeg
– ½ teaspoon ground ginger
– ¼ teaspoon ground cloves
– ½ teaspoon salt
– ½ cup cold unsalted butter, cubed
– ¾ cup canned pumpkin puree
– ½ cup heavy cream
– 1 large egg
– 1 teaspoon vanilla extract
– Optional: ½ cup chocolate chips or chopped nuts
– Optional glaze: 1 cup powdered sugar, 1-2 tablespoons milk
Instructions
Making Classic Pumpkin Scones is an easy and enjoyable process. Follow these detailed steps for perfect results:
1. Preheat the Oven: Preheat your oven to 400°F (200°C) and line a baking sheet with parchment paper.
2. Combine Dry Ingredients: In a large bowl, whisk together the flour, granulated sugar, baking powder, cinnamon, nutmeg, ginger, cloves, and salt.
3. Cut in Butter: Add the cold cubed butter into the dry ingredients. Use a pastry cutter or your fingers to blend until the mixture resembles coarse crumbs.
4. Mix Wet Ingredients: In another bowl, combine the canned pumpkin puree, heavy cream, egg, and vanilla extract. Whisk until smooth.
5. Combine Mixtures: Create a well in the center of the dry ingredients, and pour the wet mixture into it. Stir gently until just combined; avoid overmixing.
6. Fold in Extras (if desired): If you’re adding chocolate chips or nuts, gently fold them into the dough.
7. Shape the Dough: Turn the dough out onto a lightly floured surface and shape it into a disc about 1 inch thick. Cut into wedges or use a round cutter for shapes.
8. Transfer to Baking Sheet: Place the scones on the prepared baking sheet, spacing them about 2 inches apart.
9. Bake: Bake in the preheated oven for 25-30 minutes or until golden brown. A toothpick should come out clean when inserted into the center.
10. Cool: Remove from the oven and let cool on the baking sheet for 5-10 minutes before transferring to a wire rack.
11. Prepare the Glaze (optional): In a small bowl, mix powdered sugar with milk until you achieve a smooth consistency. Drizzle over cooled scones.
These straightforward steps lead to amazing scones that are sure to please everyone!
Nutrition
- Serving Size: 8 scones
- Calories: 240 kcal
- Fat: 10g
- Protein: 3g