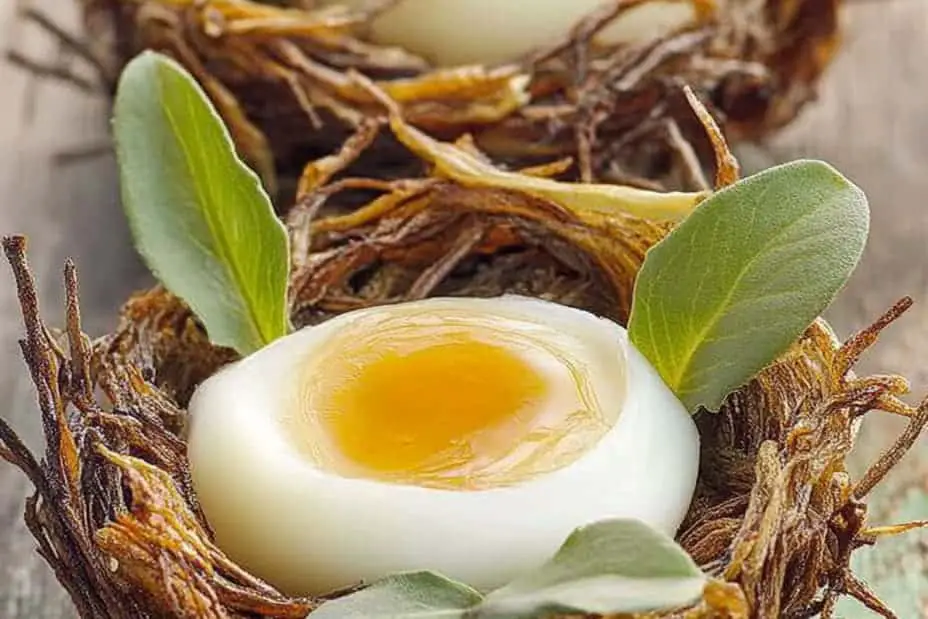

Edible Potato Nests are an amazing and unique way to celebrate Easter. Not only are they visually delightful, but they also offer a fun twist on traditional Easter treats. Picture a plate filled with crispy, golden nests made of finely shredded potatoes, each cradling colorful candy eggs. It’s a dish that brings whimsy and creativity into your holiday festivities, making it a hit with both kids and adults. The combination of textures and flavors will leave everyone talking about this special treat long after the holiday has ended.
The concept is simple yet ingenious: transforming humble potatoes into edible nests that will dazzle your dinner table. These nests are perfect for brunch or as a fun centerpiece at your Easter gathering. The process becomes a family activity, encouraging everyone to pitch in and help. The joy of creating these delightful nests together adds to the magic of the season, ensuring that Easter is filled with laughter, creativity, and teamwork.
If you think that edible treats must be overly complicated, think again! This recipe provides a wonderful opportunity to create something memorable without spending all day in the kitchen. With its combination of straightforward steps and accessible ingredients, you can whip up a batch of these nests in no time. Edible Potato Nests add a playful and delicious twist to your holiday celebrations, making it an unforgettable Easter treat that is bound to impress. Let’s dive into the details of why you’ll love this recipe!
Why You’ll Love This Recipe
Creating Edible Potato Nests is not only fun; it also results in a delightful treat that everyone will enjoy. Here are several reasons why this recipe stands out:
1. Interactive Cooking Experience: Get the whole family involved in creating these nests. It’s a great way to bond and create lasting memories.
2. Simple Ingredients: Most of the ingredients are likely already in your kitchen, making it easy and cost-effective.
3. Eye-Catching Presentation: The nests are visually appealing and add a festive touch to your Easter table.
4. Versatile Filling Options: While candy eggs are traditional, you can fill the nests with a variety of treats, from chocolate to mini pastries.
5. Great for All Ages: Kids will love the fun of decorating their nests, while adults will appreciate the deliciousness.
6. Leftover Potatoes?: This recipe is an excellent way to use any leftover potatoes, reducing food waste while cooking something spectacular.
These factors embody the spirit of Easter: creativity, sharing, and enjoyment. Each bite of the Edible Potato Nests combines the savory flavor of potatoes with the sweetness of candy, creating a delightful balance that makes them a must-try.
Preparation and Cooking Time
Creating your Edible Potato Nests is not as time-consuming as it may seem. Here’s a breakdown of the time you’ll need:
– Preparation Time: 30 minutes
– Cooking Time: 40 minutes
– Cooling Time: 10 minutes
In total, you can expect to spend just over an hour from start to finish! This makes the nests a quick option for a last-minute treat.
Ingredients
– 2 large russet potatoes
– 1 teaspoon salt
– 1 teaspoon black pepper
– 1 egg
– ½ cup all-purpose flour
– ½ cup grated cheese (cheddar or mozzarella)
– ½ teaspoon garlic powder (optional)
– Vegetable oil for frying
– Assorted candy eggs or other fillings for decoration
Step-by-Step Instructions

Creating Edible Potato Nests is straightforward when you follow these easy steps:
1. Preheat the Oven: Start by preheating your oven to 400°F (200°C).
2. Prepare the Potatoes: Peel and grate the russet potatoes using a box grater or food processor. Rinse the grated potatoes under cold water to remove excess starch.
3. Drain Excess Water: Place the grated potatoes in a clean kitchen towel and squeeze out as much moisture as possible.
4. Mix Ingredients: In a large mixing bowl, combine the drained potatoes with salt, black pepper, egg, flour, grated cheese, and garlic powder. Mix until well combined.
5. Shape the Nests: Take small handfuls of the potato mixture and form them into nest shapes on a baking sheet lined with parchment paper. Create a hollow center where the candy eggs will sit.
6. Bake: Place the baking sheet in the preheated oven and bake for about 20-25 minutes until golden brown and crispy.
7. Fry for Extra Crispness: For added texture, heat vegetable oil in a frying pan over medium heat. Carefully fry the baked nests on each side for 2-3 minutes until golden.
8. Cool: Remove the nests from the heat and let them cool for about 10 minutes.
9. Fill the Nests: Once cooled, fill each nest with assorted candy eggs or your choice of filling.
10. Serve and Enjoy: Present the nests on a platter and enjoy the buzz of excitement around your festive creation.
These simple steps will guide you in crafting delicious and fun Edible Potato Nests that are certain to be a hit.
How to Serve
Serving your Edible Potato Nests can enhance the overall experience for you and your guests. Here are some tips to consider:
1. Presentation: Use a beautiful platter to showcase the nests. Decorating with spring-themed items, such as fresh flowers or colorful napkins, can elevate the visual appeal.
2. Combine with Other Dishes: These nests can be a fun side dish for brunch, paired with a fresh salad, quiche, or even a savory egg dish.
3. Interactive Treat: Encourage guests to customize their nests with their choice of fillings, offering a variety of candies and fruits as options.
4. Themed Napkins: To enhance the festive atmosphere, use Easter-themed napkins or plates that complement the colors of the nests.
5. Add a Beverage: Pair your nests with refreshing spring beverages, like fruity flavored waters, iced tea, or a light sparkling drink.
By adding these serving suggestions, you create an enjoyable and memorable experience for everyone at the table. The playful nature of Edible Potato Nests brings a unique flair to your Easter celebration, making it a holiday to remember.
Additional Tips
– Experiment with Toppings: Beyond candy eggs, consider using a mix of mini marshmallows, fruit pebbles, or dried fruit to create fun and colorful variations.
– Ensure Crispiness: To get that all-important crunch, avoid overcrowding the frying pan when cooking the nests. Fry them in batches for the best results.
– Garnish Creativity: Sprinkling coconut flakes or edible glitter over the filled nests can add an extra festive touch to your presentation.
Recipe Variation
Feel free to get creative! Here are a few fun variations on the Edible Potato Nests recipe:
1. Savory Nests: Swap the sweet candy eggs for savory fillings like cheese, cooked bacon bits, or even guacamole for a unique appetizer option.
2. Herb-Infused Nests: Add fresh or dried herbs like parsley, chives, or dill to the potato mixture for an aromatic twist.
3. Sweet Potato Nests: Try using sweet potatoes instead of russets for a naturally sweeter flavor that pairs well with various toppings.
Freezing and Storage
– Storage: Keep your Edible Potato Nests in an airtight container in the refrigerator. They can stay fresh for up to 3 days.
– Freezing: While it’s best to enjoy them fresh, you can freeze the nests before filling. Store them in a freezer-safe container for up to 2 months. Allow them to thaw before adding the fillings.
Special Equipment
You might find these kitchen tools helpful for crafting your Edible Potato Nests:
– Box grater or food processor for grating potatoes
– Parchment paper for easier baking and cleanup
– Mixing bowls for combining the ingredients
– Frying pan for achieving that perfect crispiness
– Baking sheet for shaping and baking the nests
Frequently Asked Questions
What type of potatoes work best for this recipe?
Russet potatoes are ideal for their starchiness, but feel free to try Yukon Gold or sweet potatoes for variations.
Can I bake the nests instead of frying them?
Yes, baking them is a healthier option. Just ensure they are cooked long enough to achieve the desired crispness.
How do I ensure my nests hold their shape?
Squeezing out excess moisture from the grated potatoes is crucial for maintaining structure. Also, form the nests tightly!
What can I substitute for eggs in this recipe?
If you need an egg substitute, try using a flaxseed meal mixed with water or applesauce for a binding agent.
Can I make these nests ahead of time?
Absolutely! You can prepare the nests a day before serving and fill them right before your gathering for maximum freshness.
Conclusion
Edible Potato Nests are a delightful and imaginative treat for Easter celebrations. Their crispy, savory shell combined with colorful candy fillings creates an engaging experience for everyone. Whether enjoyed during a family brunch or as part of a festive dessert spread, these nests will surely become a cherished tradition. The joy of creating and serving them adds a layer of connection to the Easter season, making every bite special.
Edible Potato Nests: An Amazing Ultimate Easter Treat

- Prep Time: 15 minutes
- Cook Time: 40 minutes
- Total Time: 55 minutes
Ingredients
– 2 large russet potatoes
– 1 teaspoon salt
– 1 teaspoon black pepper
– 1 egg
– ½ cup all-purpose flour
– ½ cup grated cheese (cheddar or mozzarella)
– ½ teaspoon garlic powder (optional)
– Vegetable oil for frying
– Assorted candy eggs or other fillings for decoration
Instructions
Creating Edible Potato Nests is straightforward when you follow these easy steps:
1. Preheat the Oven: Start by preheating your oven to 400°F (200°C).
2. Prepare the Potatoes: Peel and grate the russet potatoes using a box grater or food processor. Rinse the grated potatoes under cold water to remove excess starch.
3. Drain Excess Water: Place the grated potatoes in a clean kitchen towel and squeeze out as much moisture as possible.
4. Mix Ingredients: In a large mixing bowl, combine the drained potatoes with salt, black pepper, egg, flour, grated cheese, and garlic powder. Mix until well combined.
5. Shape the Nests: Take small handfuls of the potato mixture and form them into nest shapes on a baking sheet lined with parchment paper. Create a hollow center where the candy eggs will sit.
6. Bake: Place the baking sheet in the preheated oven and bake for about 20-25 minutes until golden brown and crispy.
7. Fry for Extra Crispness: For added texture, heat vegetable oil in a frying pan over medium heat. Carefully fry the baked nests on each side for 2-3 minutes until golden.
8. Cool: Remove the nests from the heat and let them cool for about 10 minutes.
9. Fill the Nests: Once cooled, fill each nest with assorted candy eggs or your choice of filling.
10. Serve and Enjoy: Present the nests on a platter and enjoy the buzz of excitement around your festive creation.
These simple steps will guide you in crafting delicious and fun Edible Potato Nests that are certain to be a hit.
Nutrition
- Serving Size: 12 nests
- Calories: 160 kcal
- Fat: 5g
- Protein: 4g