Introduction
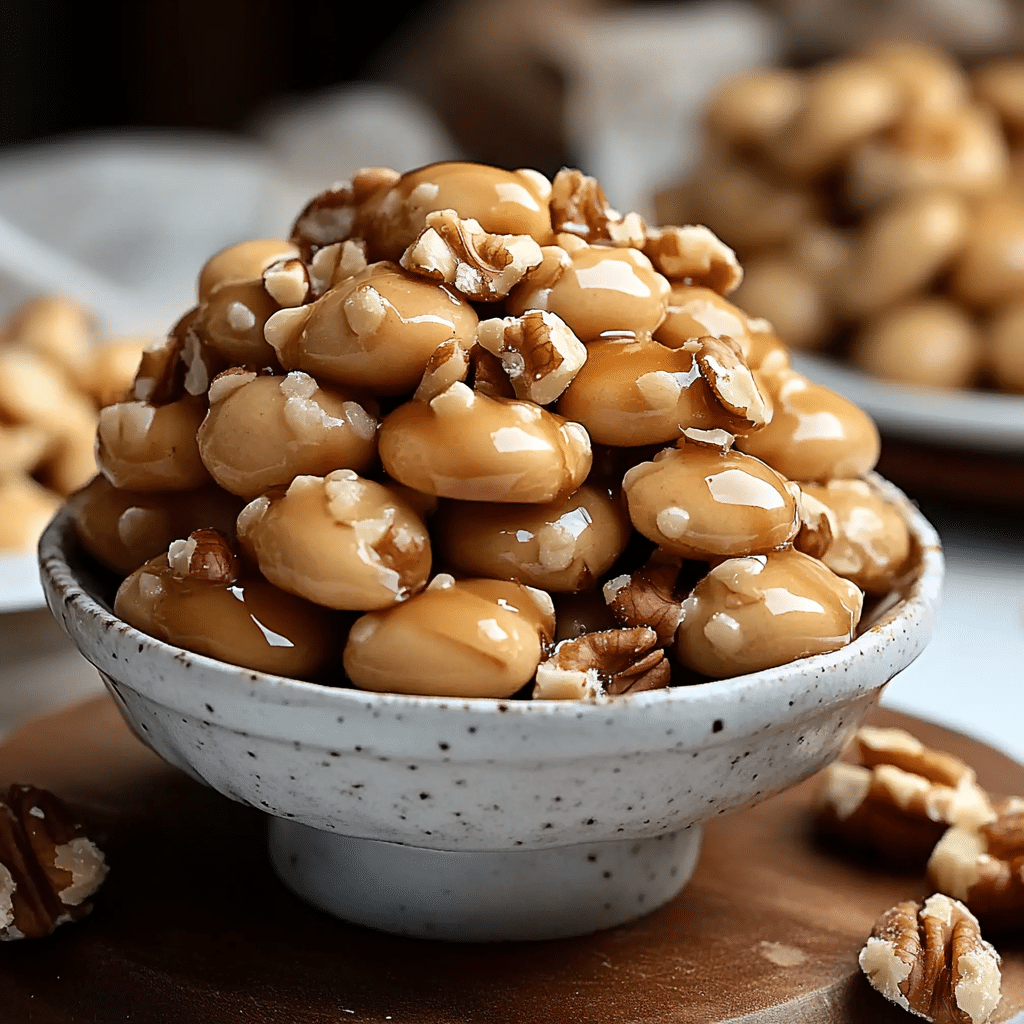
Maple Nut Goodies are a sweet blast from the past, combining the rich flavor of maple syrup with the satisfying crunch of roasted peanuts. These classic candies bring back memories of cozy afternoons, holiday treats, and trips to the candy store. Imagine biting into a soft, maple-flavored center that’s wrapped in a layer of caramelized, sugar-coated peanuts—a perfect balance of sweet and nutty goodness. It’s the kind of treat that brings comfort and joy with every bite.
Making these Maple Nut Goodies at home is easier than you might think, and it allows you to recreate all the nostalgic flavors right in your kitchen. The best part? You can customize them to suit your preferences. Want more maple flavor? Add a touch extra syrup. Prefer a little more crunch? Use a mix of different nuts. These candies are perfect for holiday gift-giving, festive gatherings, or simply satisfying your sweet tooth any time of the year.
I’ve made them for family gatherings, and they’re always a hit! There’s something special about sharing a treat that’s not only delicious but also carries a bit of nostalgia. Whether you’re making them to relive old memories or to create new ones, Maple Nut Goodies are sure to become a cherished favorite.
Why You’ll Love This Recipe
Here are several reasons why you’ll love Maple Nut Goodies:
- Nostalgic Flavor: Brings back memories of classic candy shops with its authentic maple flavor.
- Easy to Make: Simple ingredients and straightforward steps make this recipe accessible for all skill levels.
- Perfect for Gifting: Makes a great homemade gift for the holidays or special occasions.
- Customizable: Adjust the sweetness or nut variety to match your preferences.
- Crunchy and Chewy: Offers a delightful combination of textures in every bite.
- Great for Sharing: A wonderful treat to bring to parties, potlucks, or family gatherings.
- Homemade Touch: Tastes fresher than store-bought versions, with no preservatives.
- Maple-Lover’s Delight: A must-try for anyone who enjoys the unique taste of maple syrup.
- Freezes Well: Store extras in the freezer for future cravings.
- Kid-Friendly: A fun treat that kids will enjoy helping to make and eat.
Preparation Time and Cook Time
- Total Time: Approximately 1 hour (including cooling time)
- Preparation Time: 20 minutes
- Cook Time: 15-20 minutes
- Servings: Approximately 24 pieces
- Calories per serving: Approximately 100 calories
- Key Nutrients: Fat: 5g, Carbohydrates: 12g, Protein: 2g
Ingredients
Gather the following ingredients for Maple Nut Goodies:
For the Maple Center
- 1 cup powdered sugar
- 1/4 cup maple syrup
- 1 tablespoon butter, softened
- 1/2 teaspoon vanilla extract
For the Nut Coating
- 1 cup granulated sugar
- 1/2 cup light corn syrup
- 1/4 cup water
- 2 cups roasted peanuts (unsalted or lightly salted)
- 1/2 teaspoon baking soda
- 1/2 teaspoon maple extract (optional, for extra maple flavor)
Ingredient Highlights
- Maple Syrup: Adds authentic maple flavor to the candy center.
- Roasted Peanuts: Provide a crunchy coating for the perfect contrast with the soft center.
- Corn Syrup: Helps achieve the smooth texture in the candy coating.
Step-by-Step Instructions
Follow these steps to create Maple Nut Goodies:
Make the Maple Center
- Mix Ingredients: In a bowl, combine powdered sugar, maple syrup, butter, and vanilla extract. Stir until smooth and well combined.
- Shape Centers: Roll the mixture into small balls (about 1 inch in diameter). Place them on a parchment-lined baking sheet.
- Chill: Refrigerate the balls for about 30 minutes to firm up.
Prepare the Nut Coating
- Heat Sugar Mixture: In a saucepan, combine granulated sugar, corn syrup, and water. Cook over medium heat, stirring constantly until the sugar dissolves.
- Boil to Temperature: Stop stirring and bring the mixture to a boil, cooking until it reaches 300°F (hard-crack stage) on a candy thermometer.
- Add Baking Soda and Nuts: Quickly stir in the baking soda, followed by the peanuts and maple extract (if using). Mix well to coat the nuts.
Coat the Maple Centers
- Dip the Balls: Working quickly, dip each chilled maple center into the hot nut mixture, rolling to coat evenly. Use a fork or candy dipping tool to help with the process.
- Set the Candy: Place the coated candies back on the parchment-lined baking sheet. Let them cool and harden completely.
Serve
- Enjoy: Serve Maple Nut Goodies at room temperature.
- Store: Keep in an airtight container to maintain freshness.
How to Serve
Here are some serving suggestions for Maple Nut Goodies:
- Holiday Treats: Serve at Christmas or Thanksgiving gatherings as a sweet addition to the dessert table.
- Gift-Wrapped: Package in decorative tins or bags for a homemade gift.
- Party Favors: Include in goodie bags for guests at parties or events.
- Candy Bowl: Place in a bowl for snacking at social events.
- Coffee Companion: Enjoy alongside a hot cup of coffee or tea.
- On a Dessert Platter: Include with other homemade treats like fudge and cookies.
- Freeze for Later: Store in the freezer and thaw when a sweet craving strikes.
- Pair with Ice Cream: Crush and sprinkle over vanilla ice cream for extra indulgence.
- Afternoon Snack: Enjoy as a mid-day treat for a burst of sweetness.
- Take on the Go: Perfect for road trips or picnics.
Additional Tips
Maximize your candy-making success with these helpful tips:
- Use a Candy Thermometer: Ensures the sugar mixture reaches the right temperature for a proper hard-crack stage.
- Work Quickly: The nut coating hardens fast, so have everything ready before you start coating.
- Choose High-Quality Maple Syrup: The flavor will shine through, so quality matters.
- Use Light Corn Syrup: Helps achieve the right consistency without darkening the candy.
- Line Your Baking Sheet: Use parchment paper or a silicone mat for easy clean-up.
- Avoid Overmixing: Stir the baking soda in quickly to avoid deflating the candy.
- Customize Nuts: Try using a mix of almonds, pecans, or cashews instead of peanuts.
- Add Extra Flavor: Enhance the maple flavor with an additional 1/4 teaspoon of maple extract.
- Store Properly: Keep in a cool, dry place to prevent the candy from becoming sticky.
- Practice Safety: Be cautious when working with hot sugar to avoid burns.
Recipe Variations
Try these creative variations for your Maple Nut Goodies:
- Chocolate-Dipped: Dip the finished candies in melted chocolate for a decadent twist.
- Salted Maple Nuts: Sprinkle a little sea salt on the coated candies before they harden.
- Spicy Maple Nuts: Add a pinch of cayenne pepper to the nut mixture for a spicy kick.
- Caramel-Coated Nuts: Substitute caramel for the sugar coating for a different flavor profile.
- Nut-Free Version: Use sunflower seeds or pumpkin seeds for a nut-free alternative.
- Maple Bacon Nuts: Add finely chopped, cooked bacon to the coating for a sweet and salty treat.
- Double Maple: Use maple sugar in place of granulated sugar for an even stronger maple taste.
- Candied Ginger Nuts: Stir in some chopped candied ginger for a hint of spice.
- Vegan Version: Use dairy-free butter and a suitable maple-flavored syrup alternative.
- Maple and Pecan: Swap peanuts for pecans for a classic maple-pecan combination.
Freezing and Storage
Keep your Maple Nut Goodies fresh with these storage tips:
- Room Temperature: Store in an airtight container at room temperature for up to 1 week.
- Refrigeration: Keep in the fridge to extend shelf life up to 2 weeks.
- Freezing: Freeze for up to 3 months in a freezer-safe container. Thaw at room temperature before serving.
Special Equipment
Here are some essential tools you’ll need to prepare Maple Nut Goodies:
- Candy Thermometer: For accurately measuring the temperature of the sugar mixture.
- Saucepan: For cooking the sugar coating.
- Baking Sheet: For placing the coated candies to cool.
- Parchment Paper or Silicone Mat: To prevent the candies from sticking.
- Fork or Candy Dipping Tool: For dipping the maple centers into the hot mixture.
- Measuring Cups and Spoons: For precise ingredient measurements.
- Mixing Bowl: For preparing the maple candy centers.
- Wooden Spoon: For stirring the hot sugar mixture.
- Cooling Rack (optional): For setting the candies while they harden.
FAQ Section
Here are some common questions about Maple Nut Goodies:
- Can I use other nuts besides peanuts?
Yes, you can substitute with almonds, cashews, pecans, or a mix of different nuts. - How long do these candies last?
When stored properly, they can last up to 1 week at room temperature or longer in the refrigerator. - Can I make these without a candy thermometer?
It’s possible, but a candy thermometer ensures the sugar mixture reaches the right temperature. - What can I use instead of corn syrup?
Try substituting with honey or maple syrup, though the texture may vary slightly. - How can I make the candy softer?
Cook the sugar mixture to a lower temperature, around 250°F (firm-ball stage), for a chewier texture. - Can I add chocolate to this recipe?
Yes, you can drizzle melted chocolate over the finished candies or dip them entirely. - Is this recipe gluten-free?
Yes, the ingredients listed are naturally gluten-free. - Can I use maple extract instead of syrup?
Maple syrup is recommended for its natural flavor, but you can enhance the taste with a bit of maple extract. - How can I clean the saucepan after making the candy?
Soak the saucepan in hot water to dissolve any hardened sugar before washing. - What if the sugar mixture hardens too quickly?
Reheat gently to soften it enough for coating the remaining candies.
Maple Nut Goodies
- Prep Time: 20 minutes
- Cook Time: 15-20 minutes
- Total Time: 1 hour
Ingredients
For the Maple Center
- 1 cup powdered sugar
- 1/4 cup maple syrup
- 1 tablespoon butter, softened
- 1/2 teaspoon vanilla extract
For the Nut Coating
- 1 cup granulated sugar
- 1/2 cup light corn syrup
- 1/4 cup water
- 2 cups roasted peanuts (unsalted or lightly salted)
- 1/2 teaspoon baking soda
- 1/2 teaspoon maple extract (optional, for extra maple flavor)
Instructions
Make the Maple Center
- Mix Ingredients: In a bowl, combine powdered sugar, maple syrup, butter, and vanilla extract. Stir until smooth and well combined.
- Shape Centers: Roll the mixture into small balls (about 1 inch in diameter). Place them on a parchment-lined baking sheet.
- Chill: Refrigerate the balls for about 30 minutes to firm up.
Prepare the Nut Coating
- Heat Sugar Mixture: In a saucepan, combine granulated sugar, corn syrup, and water. Cook over medium heat, stirring constantly until the sugar dissolves.
- Boil to Temperature: Stop stirring and bring the mixture to a boil, cooking until it reaches 300°F (hard-crack stage) on a candy thermometer.
- Add Baking Soda and Nuts: Quickly stir in the baking soda, followed by the peanuts and maple extract (if using). Mix well to coat the nuts.
Coat the Maple Centers
- Dip the Balls: Working quickly, dip each chilled maple center into the hot nut mixture, rolling to coat evenly. Use a fork or candy dipping tool to help with the process.
- Set the Candy: Place the coated candies back on the parchment-lined baking sheet. Let them cool and harden completely.
Serve
- Enjoy: Serve Maple Nut Goodies at room temperature.
- Store: Keep in an airtight container to maintain freshness.
Nutrition
- Serving Size: 24 picies
- Calories: 100 kcal
- Fat: 5g
- Carbohydrates: 12g
- Protein: 2g
Conclusion
Maple Nut Goodies are a delicious and nostalgic treat that bring together the sweet, rich flavor of maple with the satisfying crunch of roasted nuts. This homemade version allows you to recreate the classic candy, adding a personal touch to every bite. With their perfect balance of sweetness and nuttiness, these goodies are ideal for gifting, snacking, or adding a festive touch to holiday celebrations.
Whether you’re reminiscing about childhood favorites or sharing these delightful treats with a new generation, Maple Nut Goodies are sure to bring a smile to everyone’s face. They’re easy to make, store well, and can be enjoyed anytime you’re craving a sweet indulgence.
I can’t wait to see your homemade Maple Nut Goodies! Be sure to take a picture and tag me on social media—I’d love to see how they turn out!

