

Introduction
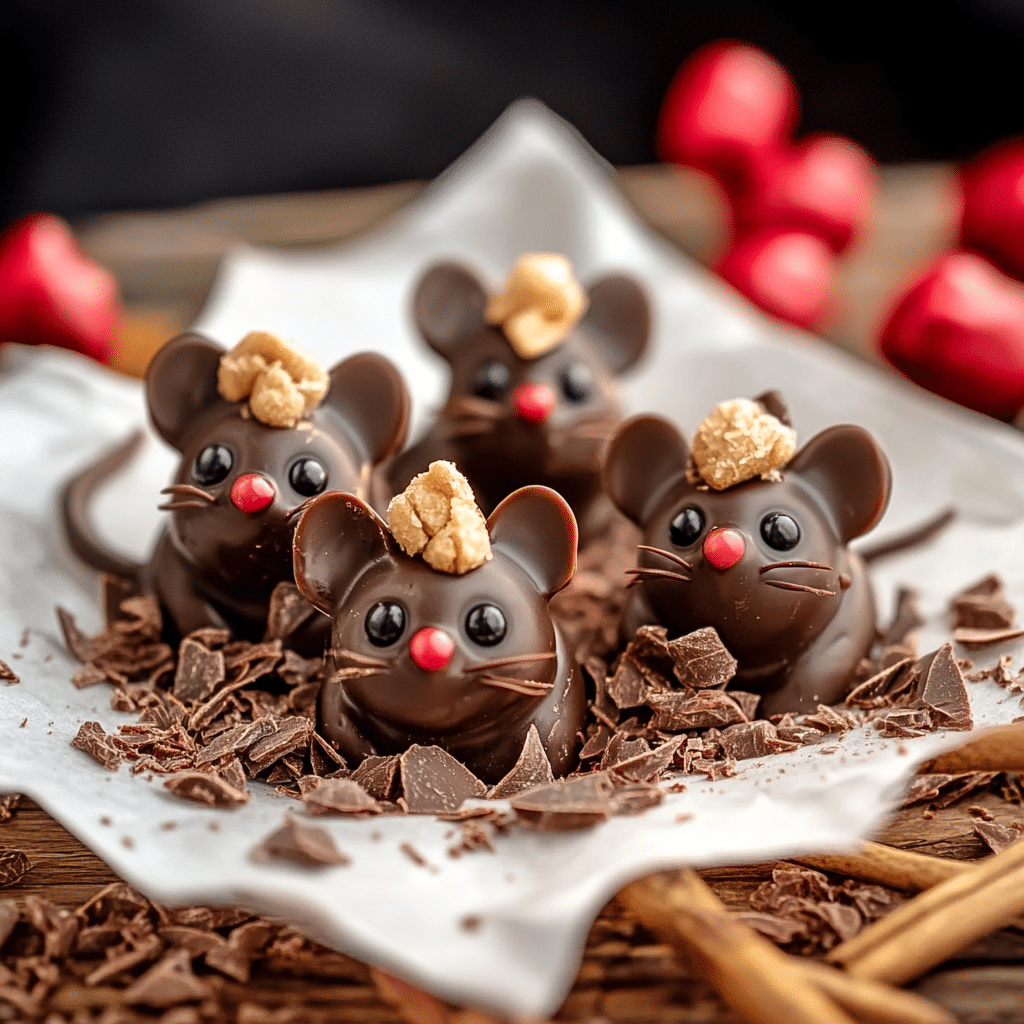
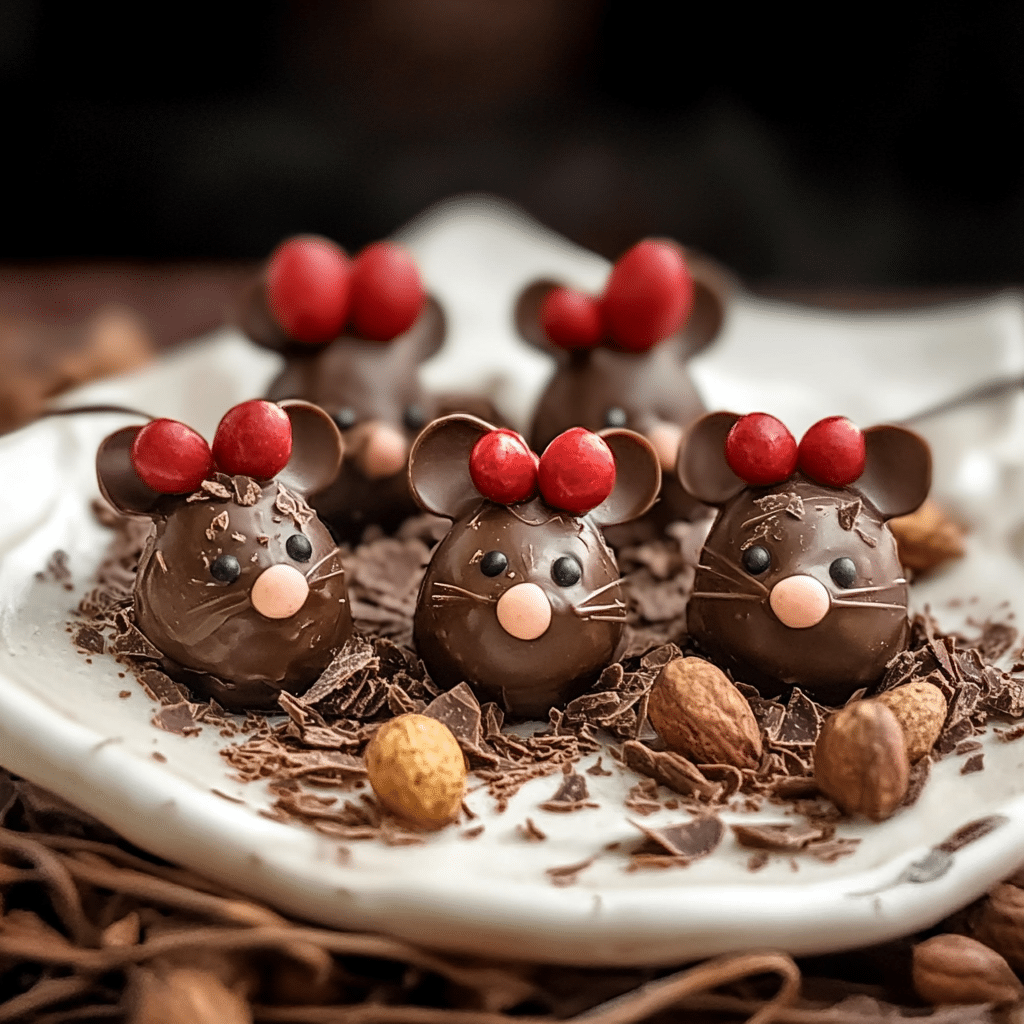
Chocolate Mice are a whimsical treat that adds a playful touch to any celebration. These adorable little creatures are crafted from creamy chocolate, nuts, and candy, creating a delightful mix of textures and flavors. Their cute tails and edible “ears” make them not only tasty but also charming little works of art that will have everyone grinning. Whether you’re whipping them up for Halloween, a birthday party, or just for fun, these chocolate mice are sure to steal the spotlight and bring joy to any occasion.
I first made Chocolate Mice when I was looking for a fun, interactive treat to make with my kids for a Halloween party. They loved getting involved in creating the little faces, and we all enjoyed the process just as much as the end result. The combination of smooth chocolate with crunchy nuts and the playful candy features makes them so irresistible. I love how these treats work for so many occasions—whether it’s a spooky Halloween treat or a birthday surprise, they always brighten up the mood.
These mice are easy to make but look incredibly impressive. You can get creative with your candy choices for the noses and ears, and you can even switch up the flavor of the chocolate to suit your preferences. They also make fantastic party favors or gifts—just place them in a cute box or bag, and they’re ready to go! Trust me, these little chocolate mice will be a hit at your next celebration, no matter the occasion.
Perfect for:
Turn your leftovers into tasty chef-like dishes with Duo Cover.
Turn your leftovers into tasty chef-like dishes with Duo Cover.

- Halloween parties
- Birthday parties
- Holiday treats
- Kids’ events
- Chocolate lovers
Why You’ll Love This Chocolate Mice
Here’s why Chocolate Mice will become your new favorite treat:
- Adorable Presentation: These little mice are as cute as they are delicious. With their tiny tails and sweet, edible features, they’ll steal the show at any event.
- Perfect Balance of Chocolate and Crunch: The chocolate coating, combined with the nutty bodies, gives each bite a satisfying crunch and a creamy chocolate flavor.
- Customizable: You can personalize each chocolate mouse with different types of nuts, candies, and decorations, making them unique for any occasion.
- Fun and Interactive to Make: Making chocolate mice is a fun activity for kids and adults alike. Everyone will love getting involved in the creative process.
- Versatile Treat: These mice can be served at a variety of events, from spooky Halloween gatherings to elegant holiday parties.
Preparation and Cooking Time
- Total Time: 1 hour
- Preparation Time: 40 minutes
- Chilling Time: 20 minutes
- Servings: 12-15 chocolate mice
- Calories per serving: Approximately 150 calories (per mouse)
- Key Nutrients: Protein: 3g, Carbs: 17g, Fat: 9g
Ingredients
You will need the following ingredients to make Chocolate Mice:
- 12-15 whole almonds (for the bodies)
- 1 cup semisweet or milk chocolate chips
- 2 tablespoons vegetable shortening or coconut oil (to help the chocolate set)
- 24 small candy eyes (or use mini chocolate chips)
- 12-15 mini pretzel sticks (for the tails)
- 12-15 small candies (such as jelly beans or M&Ms, for the ears)
- 12-15 small chocolate chips (for the noses)
- 1/4 cup crushed graham crackers or cookie crumbs (for rolling the almond bodies)
Ingredient Highlights
- Whole Almonds: These are used for the bodies of the mice. Their shape and texture make them the perfect base for the cute, mouse-like form.
- Chocolate Chips: Choose high-quality semisweet or milk chocolate chips to melt and coat the mice. The chocolate adds both flavor and a smooth texture.
- Pretzel Sticks: Mini pretzels serve as the tails, giving the mice a fun, crunchy detail.
- Candy Eyes: You can buy small candy eyes or use mini chocolate chips to make the eyes of the mice. These details add a charming, fun touch.
- Mini Chocolate Chips (for noses): Small chocolate chips work perfectly as the noses of the mice, adding more chocolate flavor.
- Candy Ears: Small candies, such as jelly beans or M&Ms, are used to create the ears, adding a playful, colorful aspect to the design.
Step-by-Step Instructions


Making these Chocolate Mice is a fun and simple process:
Prepare the Mice Bodies:
- Prepare the Almonds: Begin by selecting whole almonds. If needed, use a knife to trim off any excess skin. The almonds should be whole to form the body of the mouse.
- Crush the Graham Crackers: In a small bowl, crush the graham crackers or cookies until you have small crumbs. This will give the almond bodies a nice coating that mimics the mouse’s fur.
Melt the Chocolate:
- Melt the Chocolate: In a heatproof bowl, melt the chocolate chips with the vegetable shortening or coconut oil. Use the microwave in 30-second intervals or melt over a double boiler, stirring until smooth.
Assemble the Mice:
- Dip the Almonds: Dip each almond into the melted chocolate, ensuring it’s fully coated. Use a fork to lift the almond out and tap it gently to remove any excess chocolate.
- Coat the Almonds in Crumbs: Immediately after dipping the almond in chocolate, roll it in the crushed graham cracker crumbs to give it a fur-like texture. Set it aside on parchment paper to set.
Add the Mice Features:
- Attach the Eyes: Once the chocolate coating is firm but not fully set, place two small candy eyes on each almond.
- Create the Ears: For each mouse, take a small candy like a jelly bean or M&M, and place it just above the eyes to serve as the ears.
- Add the Noses: Place a small chocolate chip at the pointed end of the almond to create the mouse’s nose.
- Insert the Tails: Gently insert a mini pretzel stick into the back end of each almond to serve as the mouse’s tail.
Let the Mice Set:
- Chill the Mice: Place the chocolate mice in the refrigerator for 15-20 minutes to let the chocolate set completely.
How to Serve Chocolate Mice
Chocolate Mice are perfect for a wide range of events, and here are some ideas for serving them:
- As a Party Favor: Place a few chocolate mice in small treat bags or on a platter as part of a party favor for guests to take home.
- At a Halloween Party: These adorable chocolate mice are ideal for Halloween. Arrange them on a spooky platter or inside a pumpkin for a festive touch.
- As Part of a Dessert Table: Include them alongside other fun treats like cupcakes or cake pops for a delightful, themed dessert table.
- With Hot Chocolate or Coffee: Serve these chocolate mice as a playful accompaniment to a hot chocolate or a cup of coffee at your next gathering.
- For a Cute Gift: Pack a few chocolate mice into a decorative box as a sweet, handmade gift for friends and family.
Additional Tips for Chocolate Mice
Here are some tips to make your Chocolate Mice perfect:
- Use a Toothpick for Precision: When attaching small candy eyes and noses, a toothpick can help place them exactly where you want them.
- Let the Chocolate Set Completely: Ensure that the chocolate has fully set before handling the mice to avoid smearing the chocolate.
- Personalize with Color: Use different colored candies for the ears or chocolate chips for different looks depending on the theme of your event.
- Avoid Overheating the Chocolate: When melting the chocolate, do it in intervals to avoid burning the chocolate. Stir frequently for a smooth, creamy consistency.
- Make the Mice Ahead of Time: You can make these chocolate mice a day or two in advance and store them in the fridge to save time before your event.
Recipe Variations Chocolate Mice
Here are 10 variations you can try for Chocolate Mice:
- Nut-Free Mice: Use sunflower seeds or puffed rice instead of almonds for a nut-free alternative.
- White Chocolate Mice: Use white chocolate chips instead of milk or semisweet chocolate for a lighter version.
- Peanut Butter Mice: Use peanut butter-filled pretzels for the tails to add a delicious peanut butter flavor.
- Dark Chocolate Mice: For a richer flavor, swap the milk chocolate for dark chocolate chips.
- Candy-Coated Mice: Coat the almonds in candy melts instead of chocolate for a colorful, crunchy coating.
- Marzipan Mice: Use marzipan instead of almonds for the body of the mouse for a different texture and flavor.
- Coconut Mice: Roll the chocolate-coated almonds in shredded coconut instead of graham cracker crumbs for a tropical twist.
- Caramel Mice: Drizzle caramel sauce over the chocolate before setting for a caramel-chocolate combination.
- Fruity Mice: Use small pieces of dried fruit like raisins or cranberries for the ears to add a fruity flavor.
- Mini Mouse Cake Pops: Make mini cake pops with chocolate coating and tiny mouse features for a fun, cake-like twist.
Freezing and Storage
- Freezing: Chocolate Mice can be stored in the freezer for up to 1 month. Place them in an airtight container with parchment paper between layers to avoid sticking.
- Storage: Store the mice in an airtight container in the fridge for up to 5 days. Keep them in a cool place to maintain their shape and prevent the chocolate from melting.
Special Equipment Chocolate Mice
Here are some special equipment items to make preparing your Chocolate Mice easier:
- Heatproof Bowl: Use a heatproof bowl for melting the chocolate in the microwave or over a double boiler.
- Electric Mixer or Food Processor: If you prefer to crush the graham crackers quickly, a food processor can help speed up the process.
- Parchment Paper: Use parchment paper to line the surface where the chocolate mice will set. This prevents them from sticking and makes cleanup easier.
- Toothpicks: Toothpicks are handy for placing the candy eyes, noses, and ears precisely.
- Small Tongs or Fork: A small set of tongs or a fork can help dip the almonds into the chocolate without making a mess.
FAQ Section Chocolate Mice
- Can I make these chocolate mice ahead of time?
Yes, you can make them a day or two ahead of your event. Just store them in the fridge or freezer until ready to serve. - What can I use for the tails if I don’t have pretzel sticks?
You can use thin licorice strings, spaghetti, or even candy cane pieces for the tails. - How long can I store these chocolate mice?
You can store them in the fridge for up to 5 days, or freeze them for up to 1 month. - Can I use something other than almonds?
Yes, try using cashews, hazelnuts, or even marzipan for the mouse body. - Are these mice customizable for different holidays?
Absolutely! You can change the candy ears, tails, and eyes to match different colors for various holidays, like red and green for Christmas or pastels for Easter.
Chocolate Mice
- Prep Time: 40 minutes
- Total Time: 1 hour
Ingredients
You will need the following ingredients to make Chocolate Mice:
- 12–15 whole almonds (for the bodies)
- 1 cup semisweet or milk chocolate chips
- 2 tablespoons vegetable shortening or coconut oil (to help the chocolate set)
- 24 small candy eyes (or use mini chocolate chips)
- 12–15 mini pretzel sticks (for the tails)
- 12–15 small candies (such as jelly beans or M&Ms, for the ears)
- 12–15 small chocolate chips (for the noses)
- 1/4 cup crushed graham crackers or cookie crumbs (for rolling the almond bodies)
Instructions
Prepare the Mice Bodies:
- Prepare the Almonds: Begin by selecting whole almonds. If needed, use a knife to trim off any excess skin. The almonds should be whole to form the body of the mouse.
- Crush the Graham Crackers: In a small bowl, crush the graham crackers or cookies until you have small crumbs. This will give the almond bodies a nice coating that mimics the mouse’s fur.
Melt the Chocolate:
- Melt the Chocolate: In a heatproof bowl, melt the chocolate chips with the vegetable shortening or coconut oil. Use the microwave in 30-second intervals or melt over a double boiler, stirring until smooth.
Assemble the Mice:
- Dip the Almonds: Dip each almond into the melted chocolate, ensuring it’s fully coated. Use a fork to lift the almond out and tap it gently to remove any excess chocolate.
- Coat the Almonds in Crumbs: Immediately after dipping the almond in chocolate, roll it in the crushed graham cracker crumbs to give it a fur-like texture. Set it aside on parchment paper to set.
Add the Mice Features:
- Attach the Eyes: Once the chocolate coating is firm but not fully set, place two small candy eyes on each almond.
- Create the Ears: For each mouse, take a small candy like a jelly bean or M&M, and place it just above the eyes to serve as the ears.
- Add the Noses: Place a small chocolate chip at the pointed end of the almond to create the mouse’s nose.
- Insert the Tails: Gently insert a mini pretzel stick into the back end of each almond to serve as the mouse’s tail.
Let the Mice Set:
- Chill the Mice: Place the chocolate mice in the refrigerator for 15-20 minutes to let the chocolate set completely.
Nutrition
- Serving Size: 12-15 chocolate mice
- Calories: 150 kcal
- Fat: 9g
- Carbohydrates: 17g
- Protein: 3g
Conclusion
Chocolate Mice are not only adorable but also incredibly fun to make and eat! These little treats combine creamy chocolate with crunchy nuts, creating a delightful snack that’s sure to impress at any party or celebration. Whether you’re crafting them for Halloween, a birthday party, or just because, these charming chocolate mice are guaranteed to bring smiles to everyone.
The beauty of this recipe is in its simplicity. With just a few ingredients, you can create these sweet little creatures in no time. Get creative with the shapes, decorations, or even flavor combinations, and make them uniquely your own. They’re perfect for getting the kids involved in the kitchen or for impressing your guests with a whimsical touch.
I can’t wait to see your Chocolate Mice creations! Be sure to snap a photo and tag me on Instagram—I’d love to see how they turn out. Let me know how you made them your own and share your experience in the comments! Happy baking!


