
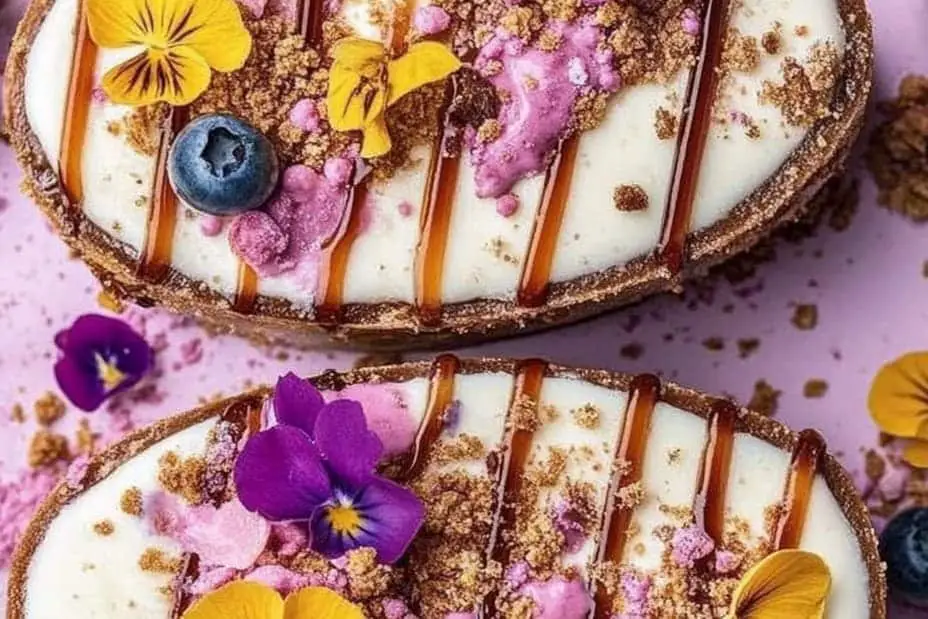

Easter Egg Cheesecake is a delightful way to celebrate spring with something extra special. This dessert captures the festive spirit of Easter through its vibrant colors and delicious flavors. The rich creaminess of the cheesecake combined with the classic crunchy graham cracker crust creates a decadent treat that’s perfect for gatherings or family feasts. Imagine a slice of this cheesecake sitting pretty on your dessert table, adorned with colorful chocolate eggs. It’s not just food; it’s a centerpiece that embodies joy and festivity.
If you are looking for something truly amazing to impress your guests or make your family smile, this Easter Egg Cheesecake should be your go-to recipe. The combination of velvety cream cheese and the playful addition of Easter eggs makes this dessert unique. It speaks to young and old alike, offering a slice of nostalgia blended with the excitement of childhood Easter egg hunts.
In this article, you’ll uncover why this Easter Egg Cheesecake is an incredible pick for your Easter celebration, how to prepare it in just a few simple steps, and tips on how to serve it to maximize enjoyment. Whether you’re a beginner baker or a seasoned pro, you’ll enjoy crafting this wonderful cheesecake that’s sure to become a tradition in your home.
Why You’ll Love This Recipe
Easter Egg Cheesecake is more than just a dessert; it’s an experience that brings people together. Here are some reasons why you’ll adore this recipe:
1. Visually Stunning: The colorful Easter eggs make it an eye-catching addition to your dessert table.
2. Rich Flavor: The combination of cream cheese, sugar, and vanilla creates a rich and creamy flavor profile that is hard to resist.
3. Easy to Make: Despite its impressive appearance, this cheesecake is simple to prepare with easy-to-follow steps.
4. Customizable: You can adjust the toppings or flavorings according to your preferences, such as using different types of chocolate eggs or fruit.
5. Perfect for Sharing: It’s a great dessert for potlucks, family gatherings, or Easter brunch, allowing everyone to dig in and enjoy.
6. Memorable Tradition: Making this cheesecake can become a cherished tradition, making every Easter special.
With all these features combined, it’s easy to see why the Easter Egg Cheesecake will be a hit. Each bite offers a burst of flavor combined with a sense of celebration, making it unforgettable.
Preparation and Cooking Time
Creating this delightful Easter Egg Cheesecake requires a bit of time, but the end result is worth every minute. Here’s a breakdown of how long it typically takes to prepare:
– Preparation Time: 30 minutes
– Cooking Time: 60 minutes
– Cooling Time: 4 hours (or overnight for best results)
– Total Time: Approximately 5 hours and 30 minutes
Keep in mind that chilling the cheesecake is crucial for achieving the perfect texture, so plan accordingly!
Ingredients
– 1 ½ cups graham cracker crumbs
– ½ cup unsalted butter, melted
– 2 cups cream cheese, softened
– 1 cup granulated sugar
– 3 large eggs
– 1 teaspoon vanilla extract
– 1 cup sour cream
– ½ cup heavy cream
– 1 cup chocolate mini eggs (for mixing)
– Chocolate-coated eggs (for garnish)
Step-by-Step Instructions

Follow these simple steps to create your own spectacular Easter Egg Cheesecake:
1. Preheat Oven: Preheat your oven to 325°F (163°C).
2. Prepare the Crust: In a bowl, mix the graham cracker crumbs and melted butter until well combined. Press the mixture into the bottom of a 9-inch springform pan to form an even layer.
3. Bake the Crust: Bake in the preheated oven for 10 minutes. Remove and set aside to cool.
4. Mix Cream Cheese: In a large mixing bowl, beat the softened cream cheese with a hand mixer until smooth.
5. Add Sugar: Gradually add the granulated sugar, continuing to beat until fluffy and well combined.
6. Incorporate Eggs: Add the eggs, one at a time, beating on low speed after each addition until just combined.
7. Add Vanilla and Sour Cream: Mix in the vanilla extract and sour cream, ensuring it is well blended without overmixing.
8. Fold in Mini Eggs: Gently fold in the chocolate mini eggs, incorporating them evenly throughout the mixture.
9. Pour Filling: Pour the cheesecake filling over the cooled crust in the springform pan.
10. Bake: Bake in the oven for 60 minutes, or until the center is set but still slightly jiggly.
11. Cool Down: Turn off the oven, leave the door ajar, and let the cheesecake cool inside for about an hour.
12. Chill: Refrigerate for at least 4 hours or overnight for best results.
13. Prepare for Serving: Before serving, whip the heavy cream to soft peaks. Spread or pipe it over the top of the chilled cheesecake.
14. Garnish: Decorate the top with additional chocolate-coated eggs for a festive touch.
15. Slice and Enjoy: Use a warm knife to slice for clean edges and serve chilled.
This straightforward method ensures that anyone can create this incredible cheesecake with ease!
How to Serve
Serving your Easter Egg Cheesecake can enhance the overall experience. Here are some tips:
1. Presentation Style: Use a decorative cake stand or platter to showcase the cheesecake. A simple garnish of chocolate eggs adds a festive touch.
2. Slice Sizes: Keep the slices generous but manageable. Smaller pieces encourage guests to return for seconds!
3. Pairing Options: Offer servings with fresh fruit, such as strawberries or raspberries, to complement the rich cheesecake.
4. Beverage Pairing: Serve with a hot cup of coffee, herbal tea, or a luscious dessert wine to elevate the dessert experience.
5. Make It Interactive: Consider offering extra toppings like whipped cream or chocolate syrup on the side, allowing guests to customize their slices.
By presenting the cheesecake beautifully and considering pairing options, you’ll ensure your guests enjoy every bite, creating lasting memories during your Easter celebrations.
With Easter Egg Cheesecake in your repertoire, you’re all set to become the star of springtime gatherings, impressing everyone with your incredible baking skills. Enjoy making this festive dessert, and watch as it brings smiles to all who partake!
Additional Tips
– Use Fresh Ingredients: For the best flavor, opt for fresh eggs and real vanilla extract instead of imitation. This will enhance the quality of your cheesecake.
– Room Temperature Ingredients: Make sure your cream cheese, eggs, and sour cream are at room temperature before you begin. This will ensure a smoother batter.
– Avoid Overmixing: When incorporating eggs and other ingredients, mix until just combined. Overmixing can lead to cracks in the cheesecake.
– Serve Chilled: This cheesecake is best served cold. Be sure to refrigerate it long enough for complete chilling before slicing.
Recipe Variation
Feel free to get creative! Here are a few fun variations to try:
1. Fruit Swirl: Add a fruity twist by swirling in some raspberry or strawberry puree into the cheesecake batter before baking for a delightful contrast.
2. Chocolate Mint Cheesecake: Incorporate peppermint extract into the batter for a refreshing mint flavor that pairs well with chocolate mini eggs.
3. Oreo Crust: Substitute the graham cracker crust with crushed Oreos for a deliciously rich chocolate base.
4. Nut-Topped Variation: Add crushed nuts to the crust or sprinkle them on top of the cheesecake before serving for a delightful crunch.
Freezing and Storage
– Storage: Keep your Easter Egg Cheesecake covered in the refrigerator. It will remain fresh for about 4-5 days.
– Freezing: You can freeze the cheesecake for up to 3 months. Wrap it well in plastic wrap and foil to avoid freezer burn. Thaw in the refrigerator overnight before serving.
Special Equipment
To prepare this Easter Egg Cheesecake, you’ll need some essential tools:
– Springform Pan: This is crucial for easy removal of the cheesecake after it has set.
– Electric Mixer: A hand mixer or stand mixer will make it easier to achieve a smooth cheesecake batter.
– Mixing Bowls: Use two mixing bowls to help with ingredient separation for a seamless mixing process.
– Rubber Spatula: A spatula will help in folding in ingredients and scraping down the sides of the bowl.
Frequently Asked Questions
How do I know when the cheesecake is done baking?
Check for a slight jiggle in the center. The edges should be set, but the middle should move slightly when wobbled.
Can I make the cheesecake in advance?
Absolutely! It’s perfect to make a day ahead of time to let the flavors meld and to ensure it’s fully chilled.
What if my cheesecake cracks?
Don’t worry! Cracks can happen. They can often be covered with whipped cream and chocolate eggs for a festive appearance.
Can I use flavored cream cheese?
Yes, using flavored cream cheese can add a unique twist to your cheesecake. Try using strawberry or chocolate-flavored for different tastes.
Is there a way to make this cheesecake lower in calories?
You can use low-fat cream cheese and replace some of the sugar with a sugar substitute to create a lighter version.
Conclusion
The Easter Egg Cheesecake is a delightful centerpiece for your holiday gatherings. Its combination of creamy texture, rich flavor, and festive appeal make it a must-try dessert. It’s easy to prepare, visually stunning, and brings people together for a memorable celebration. Embrace the joy of spring by making this cheesecake a tradition in your home! Your family and friends will always look forward to enjoying this exquisite treat year after year.
Easter Egg Cheesecake: An Incredible Ultimate Recipe for Everyone

- Prep Time: 30 minutes
- Cook Time: 60 minutes
- Total Time: 1 hour 30 minutes
Ingredients
– 1 ½ cups graham cracker crumbs
– ½ cup unsalted butter, melted
– 2 cups cream cheese, softened
– 1 cup granulated sugar
– 3 large eggs
– 1 teaspoon vanilla extract
– 1 cup sour cream
– ½ cup heavy cream
– 1 cup chocolate mini eggs (for mixing)
– Chocolate-coated eggs (for garnish)
Instructions
Follow these simple steps to create your own spectacular Easter Egg Cheesecake:
1. Preheat Oven: Preheat your oven to 325°F (163°C).
2. Prepare the Crust: In a bowl, mix the graham cracker crumbs and melted butter until well combined. Press the mixture into the bottom of a 9-inch springform pan to form an even layer.
3. Bake the Crust: Bake in the preheated oven for 10 minutes. Remove and set aside to cool.
4. Mix Cream Cheese: In a large mixing bowl, beat the softened cream cheese with a hand mixer until smooth.
5. Add Sugar: Gradually add the granulated sugar, continuing to beat until fluffy and well combined.
6. Incorporate Eggs: Add the eggs, one at a time, beating on low speed after each addition until just combined.
7. Add Vanilla and Sour Cream: Mix in the vanilla extract and sour cream, ensuring it is well blended without overmixing.
8. Fold in Mini Eggs: Gently fold in the chocolate mini eggs, incorporating them evenly throughout the mixture.
9. Pour Filling: Pour the cheesecake filling over the cooled crust in the springform pan.
10. Bake: Bake in the oven for 60 minutes, or until the center is set but still slightly jiggly.
11. Cool Down: Turn off the oven, leave the door ajar, and let the cheesecake cool inside for about an hour.
12. Chill: Refrigerate for at least 4 hours or overnight for best results.
13. Prepare for Serving: Before serving, whip the heavy cream to soft peaks. Spread or pipe it over the top of the chilled cheesecake.
14. Garnish: Decorate the top with additional chocolate-coated eggs for a festive touch.
15. Slice and Enjoy: Use a warm knife to slice for clean edges and serve chilled.
This straightforward method ensures that anyone can create this incredible cheesecake with ease!
Nutrition
- Serving Size: 12
- Calories: 450 kcal
- Fat: 30g
- Protein: 6g
