

Introduction
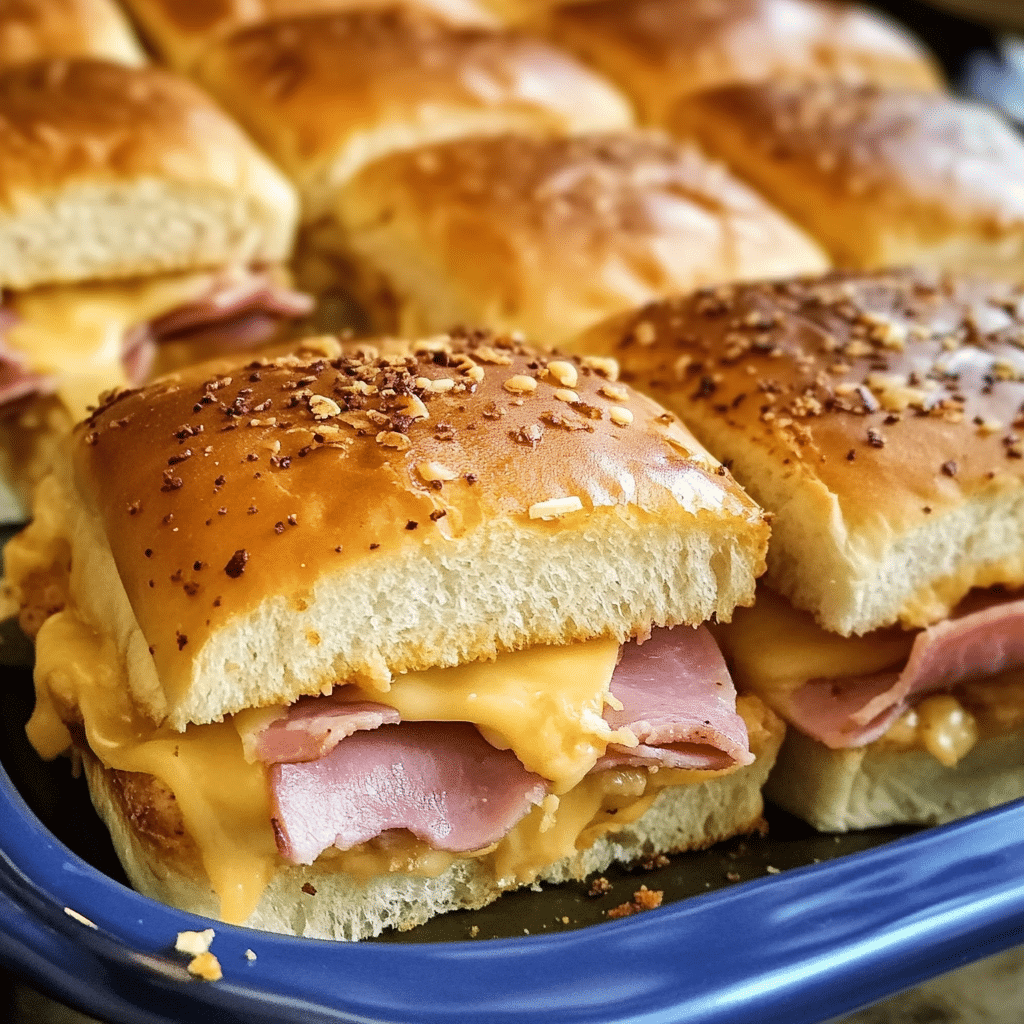
Ham and Cheese Sliders are the ultimate crowd-pleasing snack, perfect for any occasion. These little sandwiches pack a punch of flavor with their tender rolls, layers of juicy ham, melty cheese, and a rich, buttery glaze that takes them from simple to sensational. Every bite is a satisfying blend of gooey cheese and savory ham, making these sliders an irresistible treat that will have everyone coming back for more.
I’ve made these sliders for everything from game nights to casual family gatherings, and they always disappear in no time. There’s just something about the combination of the soft, warm rolls and the savory filling that makes them so comforting. Plus, the buttery glaze adds that extra touch of flavor that makes them feel like a special treat, even though they’re quick and easy to prepare.
What I love about Ham and Cheese Sliders is how versatile they are. You can make them in advance and bake them just before serving, making them an ideal snack for entertaining or even as a simple meal. Whether you’re serving them at a party or enjoying them as a late-night snack, these sliders are sure to be a hit. So, grab your ingredients, and get ready to enjoy a bite-sized sandwich that’s big on flavor and guaranteed to satisfy!
Perfect for:
Turn your leftovers into tasty chef-like dishes with Duo Cover.
Turn your leftovers into tasty chef-like dishes with Duo Cover.

- Game day snacks
- Potlucks and picnics
- Family gatherings
- Easy weeknight dinners
- Lunchbox treats
Why You’ll Love This Ham and Cheese Sliders
Here’s why Ham and Cheese Sliders will be a favorite at your next gathering:
- Simple to Make: These sliders come together quickly and easily, perfect for busy weeknights or impromptu gatherings.
- Flavorful Glaze: The buttery glaze with mustard, poppy seeds, and a hint of sweetness adds an incredible depth of flavor that elevates the sandwich to new heights.
- Perfectly Balanced: With just the right amount of salty ham and melty cheese, these sliders are the perfect balance of savory goodness.
- Customizable: You can adjust the fillings to suit your taste—try adding pickles, switching the ham for turkey, or experimenting with different types of cheese.
- Make Ahead Option: These sliders can be prepared ahead of time, making them ideal for parties or large gatherings.
Preparation and Cooking Time
- Total Time: 30 minutes
- Preparation Time: 15 minutes
- Cooking Time: 15 minutes
- Servings: 12 sliders
- Calories per serving: Approximately 250-300 calories
- Key Nutrients: Protein: 12g, Carbs: 25g, Fat: 15g
Ingredients
Gather these ingredients to make your Ham and Cheese Sliders:
- 12 Hawaiian rolls (or slider rolls)
- 1 lb thinly sliced ham
- 12 slices Swiss cheese (or cheese of choice)
- ½ cup unsalted butter, melted
- 2 tablespoons Dijon mustard
- 1 tablespoon brown sugar
- 1 teaspoon Worcestershire sauce
- 1 tablespoon poppy seeds
- 1 tablespoon onion powder
- Salt and pepper to taste
Ingredient Highlights
- Hawaiian Rolls: These soft, slightly sweet rolls add a unique flavor to the sliders and are perfect for holding all the delicious fillings.
- Swiss Cheese: The smooth and creamy texture of Swiss cheese melts beautifully, complementing the savory ham.
- Butter and Mustard Glaze: This glaze, flavored with Dijon mustard, Worcestershire sauce, and brown sugar, adds a savory-sweet touch that makes these sliders irresistible.
- Poppy Seeds: These seeds not only add a crunchy texture but also a subtle flavor that enhances the overall taste of the sliders.
- Worcestershire Sauce: Adds a depth of flavor to the glaze, giving the sliders a savory, umami-rich profile.
Step-by-Step Instructions


Here’s how to make Ham and Cheese Sliders:
Prepare the Rolls and Fillings:
- Preheat the Oven: Preheat your oven to 350°F (175°C).
- Slice the Rolls: Without separating the individual rolls, slice the entire package of Hawaiian rolls horizontally. This creates the top and bottom layers of your slider.
- Layer the Ham and Cheese: Place the bottom half of the rolls in a 9×13-inch baking dish. Layer the ham slices evenly over the rolls, then place a slice of cheese on top of the ham for each roll.
- Top with the Other Half of Rolls: Place the top half of the rolls on top of the cheese, pressing down gently to ensure everything stays together.
Prepare the Glaze:
- Make the Butter Glaze: In a small bowl, whisk together the melted butter, Dijon mustard, brown sugar, Worcestershire sauce, poppy seeds, onion powder, salt, and pepper until smooth.
- Pour the Glaze: Pour the glaze evenly over the top of the rolls, ensuring every slider is coated with the buttery sauce.
Bake the Sliders:
- Cover with Foil: Cover the baking dish with aluminum foil and bake in the preheated oven for 10 minutes.
- Uncover and Bake: After 10 minutes, remove the foil and continue baking for an additional 5 minutes, or until the sliders are golden brown and the cheese has melted.
Serve:
- Serve Warm: Once baked, remove from the oven and let the sliders cool for a few minutes before slicing and serving.

How to Serve Ham and Cheese Sliders
Ham and Cheese Sliders are delicious when served in various ways:
- As Party Appetizers: Cut the sliders into smaller portions for bite-sized snacks at parties, game nights, or potlucks.
- With a Side Salad: Pair these sliders with a fresh green salad or coleslaw to balance out the richness of the sandwiches.
- With Chips or Fries: Serve alongside a side of crispy chips or homemade fries for a satisfying meal.
- For a Buffet: Serve on a platter at a buffet or picnic, allowing guests to grab as many as they’d like.
- For Lunch or Dinner: These sliders are perfect as a quick lunch or casual dinner, especially when paired with a side of soup.
Additional Tips for Ham and Cheese Sliders
Here are some tips to make your Ham and Cheese Sliders even better:
- Use Fresh Ham: Opt for freshly sliced deli ham for the best texture and flavor.
- Swap Cheese Types: Feel free to use other types of cheese like cheddar, provolone, or mozzarella if you prefer.
- Add Pickles or Jalapeños: If you like a bit of tang or heat, add sliced pickles or jalapeños to the sandwich before baking.
- Make It Spicy: Add a pinch of cayenne pepper or chili flakes to the glaze to give the sliders a spicy kick.
- Use Different Rolls: If you can’t find Hawaiian rolls, feel free to use any soft slider or brioche rolls for a similar texture.
Recipe Variations for Ham and Cheese Sliders
Here are 10 variations you can try for Ham and Cheese Sliders:
- Turkey and Cheese Sliders: Swap the ham for turkey for a lighter version of this sandwich.
- Bacon Ham and Cheese Sliders: Add crispy bacon to the layers for a smoky, savory twist.
- Vegetarian Sliders: Use roasted vegetables like bell peppers, zucchini, and mushrooms instead of ham for a veggie-packed version.
- BBQ Ham Sliders: Add a little BBQ sauce to the glaze for a tangy, sweet twist.
- Cheddar Ham Sliders: Swap Swiss cheese for sharp cheddar for a stronger, more intense flavor.
- Hawaiian Ham Sliders: Add pineapple slices to the sandwich for a tropical flair.
- Spicy Ham and Cheese Sliders: Add sliced jalapeños to the filling or glaze for some extra heat.
- Mustard and Dill Sliders: Add a few dill pickle slices and swap Dijon mustard for yellow mustard for a different flavor profile.
- French Onion Ham Sliders: Use caramelized onions in place of the onion powder and add French onion soup mix for an extra savory flavor.
- Sweet Ham Sliders: Add a touch of honey to the butter glaze for a sweeter, more caramelized flavor.
Freezing and Storage
- Freezing: To freeze, assemble the sliders without baking them. Wrap tightly in foil and freeze for up to 3 months. When ready to bake, add the glaze and bake as instructed.
- Storage: Leftover sliders can be stored in an airtight container in the fridge for up to 3 days. Reheat in the oven or microwave before serving.
Special Equipment for Ham and Cheese Sliders
Here are some special equipment items to make preparing your Ham and Cheese Sliders easier:
- 9×13-inch Baking Dish: A standard baking dish works perfectly for assembling and baking the sliders.
- Pastry Brush: Use a pastry brush to evenly apply the glaze over the top of the rolls.
- Small Whisk: A small whisk helps to mix the glaze ingredients together smoothly.
- Aluminum Foil: Cover the baking dish with foil to prevent the tops from getting too brown during the initial baking time.
- Sharp Knife: A sharp knife will help you slice the sliders easily without disturbing the layers.
FAQ Section for Ham and Cheese Sliders
- Can I use a different type of bread?
Yes, you can use any type of soft slider rolls or brioche buns as an alternative to Hawaiian rolls. - Can I make these sliders ahead of time?
Yes, you can assemble the sliders and store them in the refrigerator until ready to bake. Just add the glaze before baking. - Can I make these sliders without butter?
While the butter provides a rich flavor and helps the glaze adhere, you could use olive oil as a substitute for a lighter option. - Can I use pre-sliced cheese?
Yes, pre-sliced cheese will work, but fresh cheese slices may melt more evenly and taste better. - How can I make these sliders vegetarian?
Simply replace the ham with your favorite vegetables or a vegetarian meat substitute, and enjoy a meat-free version!
Ham and Cheese Sliders

Ham and Cheese Sliders are a crowd-pleasing, savory snack perfect for any occasion. These bite-sized sandwiches are made with tender rolls, layers of juicy ham, melty cheese, and a flavorful buttery glaze that makes them irresistibly delicious. Whether you’re hosting a game night, a casual family gathering, or just craving a quick snack, Ham and Cheese Sliders are always a hit. With their combination of gooey cheese and savory ham, they are the ultimate comfort food that will leave everyone satisfied.
- Prep Time: 15 minutes
- Cook Time: 15 minutes
- Total Time: 30 minutes
- Yield: 12 sliders 1x
- Category: 30 minutes meals
Ingredients
Gather these ingredients to make your Ham and Cheese Sliders:
- 12 Hawaiian rolls (or slider rolls)
- 1 lb thinly sliced ham
- 12 slices Swiss cheese (or cheese of choice)
- ½ cup unsalted butter, melted
- 2 tablespoons Dijon mustard
- 1 tablespoon brown sugar
- 1 teaspoon Worcestershire sauce
- 1 tablespoon poppy seeds
- 1 tablespoon onion powder
- Salt and pepper to taste
Instructions
Prepare the Rolls and Fillings:
- Preheat the Oven: Preheat your oven to 350°F (175°C).
- Slice the Rolls: Without separating the individual rolls, slice the entire package of Hawaiian rolls horizontally. This creates the top and bottom layers of your slider.
- Layer the Ham and Cheese: Place the bottom half of the rolls in a 9×13-inch baking dish. Layer the ham slices evenly over the rolls, then place a slice of cheese on top of the ham for each roll.
- Top with the Other Half of Rolls: Place the top half of the rolls on top of the cheese, pressing down gently to ensure everything stays together.
Prepare the Glaze:
- Make the Butter Glaze: In a small bowl, whisk together the melted butter, Dijon mustard, brown sugar, Worcestershire sauce, poppy seeds, onion powder, salt, and pepper until smooth.
- Pour the Glaze: Pour the glaze evenly over the top of the rolls, ensuring every slider is coated with the buttery sauce.
Bake the Sliders:
- Cover with Foil: Cover the baking dish with aluminum foil and bake in the preheated oven for 10 minutes.
- Uncover and Bake: After 10 minutes, remove the foil and continue baking for an additional 5 minutes, or until the sliders are golden brown and the cheese has melted.
Serve:
- Serve Warm: Once baked, remove from the oven and let the sliders cool for a few minutes before slicing and serving.
Nutrition
- Calories: 250-300 kcal
- Fat: 15g
- Carbohydrates: 25g
- Protein: 12g
Conclusion
Ham and Cheese Sliders are the ultimate snack or meal that combines savory ham, melty cheese, and a buttery, flavorful glaze all sandwiched between soft slider buns. These sliders are incredibly easy to make, making them perfect for parties, casual dinners, or a quick lunch. Their versatility means you can customize the filling to suit your taste, from adding pickles and mustard to experimenting with different types of cheese or ham.
What makes these sliders stand out is the delicious, slightly sweet glaze that bakes into the buns, giving them a golden, crispy finish while keeping the inside soft and flavorful. Whether you’re serving them as appetizers, a main dish, or a party favorite, they’re sure to be a crowd-pleaser. Plus, they can be made in advance and baked right before serving, making them a convenient and satisfying option.
I can’t wait to see how your Ham and Cheese Sliders turn out! Don’t forget to snap a photo and tag me on Instagram—I love seeing your delicious creations! Feel free to leave a comment with any unique twists you added to the recipe. Enjoy!


