

Introduction
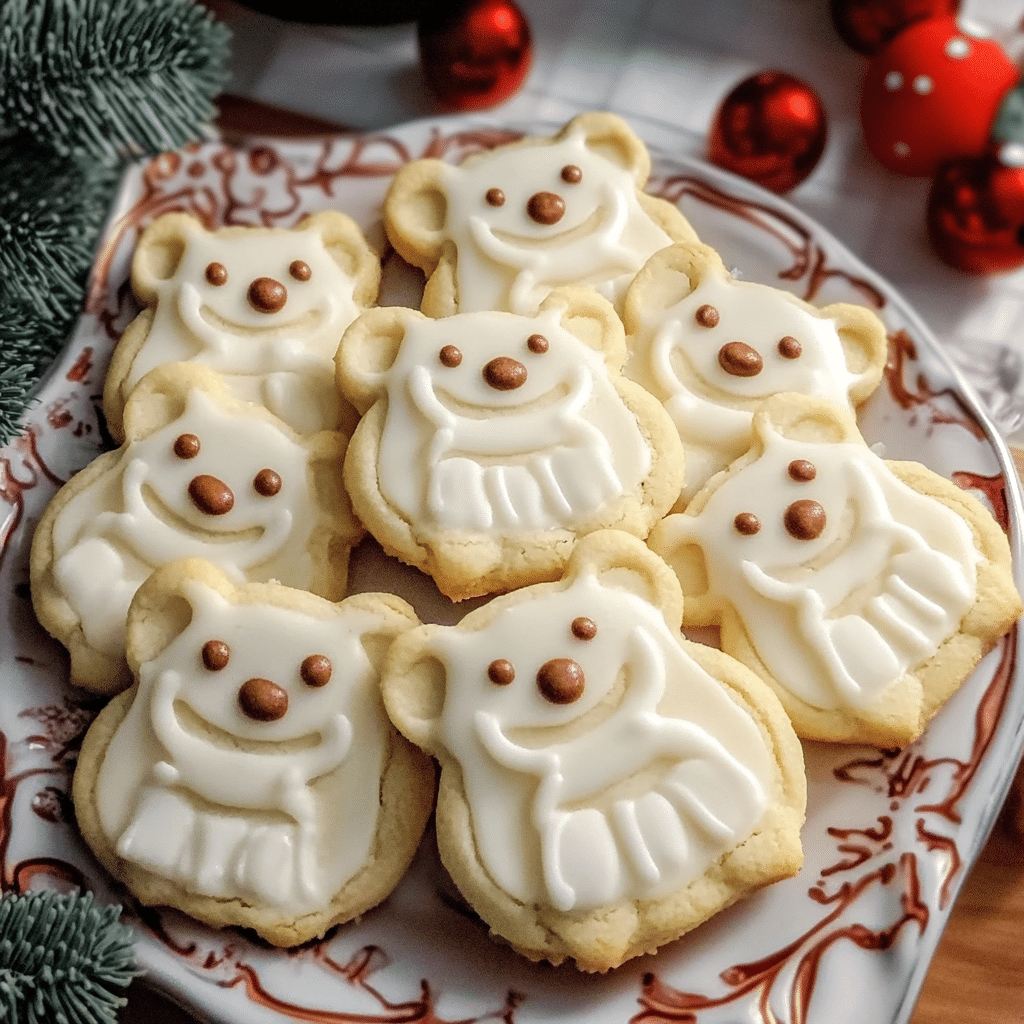
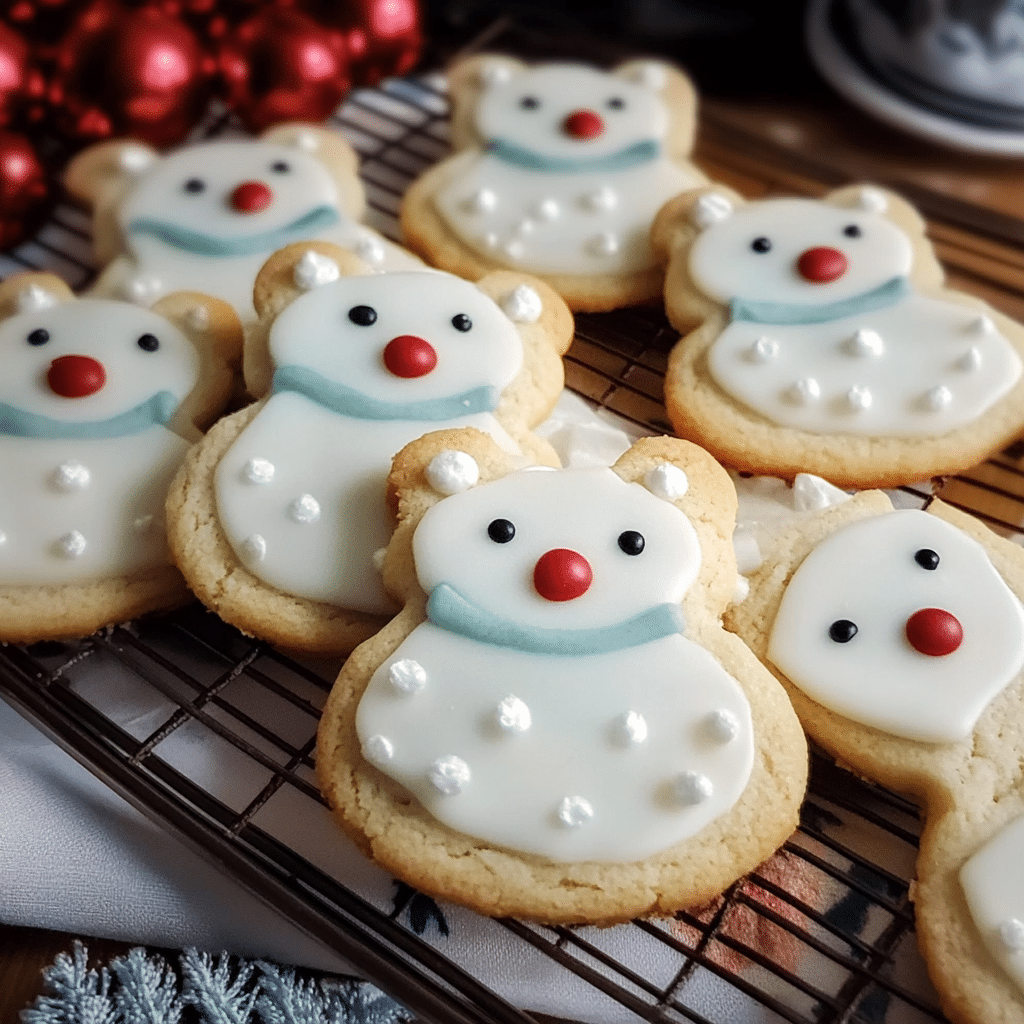
Polar Bear Cookies are a whimsical, frosty delight that transforms simple sugar cookies into charming polar bear faces, making them perfect for winter celebrations or animal-themed parties. These sweet treats start with tender sugar cookies, coated in creamy white chocolate to mimic the polar bear’s icy coat. Add playful decorations like candy eyes, chocolate chips for noses, and tiny marshmallows for ears, and you have cookies that are as fun to look at as they are to eat.
I adore making Polar Bear Cookies during the holiday season because they’re a wonderful way to get creative in the kitchen. They bring a playful touch to any cookie platter, and kids especially love helping to decorate them. A couple of winters ago, my family and I turned a baking afternoon into a full-blown Polar Bear Cookie workshop. Everyone had their own unique spin on the design, and the results were adorable—and delicious!
The best part about these cookies is their versatility. You can use a store-bought sugar cookie base for a quick and easy option, or go all out with your favorite homemade recipe. They’re a fantastic way to add a touch of whimsy to your festivities, and their irresistible sweetness ensures they’ll disappear in no time. Whether you’re hosting a holiday party, looking for a cozy baking project, or need a delightful gift idea, Polar Bear Cookies are sure to charm everyone who sees—and tastes—them!
Perfect for:
Turn your leftovers into tasty chef-like dishes with Duo Cover.
Turn your leftovers into tasty chef-like dishes with Duo Cover.

- Winter parties
- Holiday cookie exchanges
- Animal-themed celebrations
- Treats for kids
- Gifts for loved ones
Why You’ll Love This Polar Bear Cookies
Here’s why Polar Bear Cookies will become a favorite in your home:
- Adorably Festive: Their polar bear design adds charm and fun to any holiday or winter celebration.
- Kid-Friendly Activity: These cookies are easy to decorate, making them perfect for family baking days or parties with children.
- Deliciously Sweet: The combination of sugar cookies and white chocolate creates a melt-in-your-mouth treat everyone will love.
- Customizable Designs: You can personalize each cookie with unique decorations, making them as creative as you like.
- Great for Gifting: Packaged in festive wrapping, these cookies make the perfect edible gift during the holiday season.
Preparation and Cooking Time
- Total Time: 1 hour 30 minutes (plus chilling time)
- Preparation Time: 1 hour
- Baking Time: 10-12 minutes per batch
- Chilling Time: 30 minutes
- Servings: About 24 cookies
- Calories per serving: Approximately 180-200 calories
- Key Nutrients: Carbs: 28g, Fat: 8g, Protein: 2g
Ingredients
Gather these ingredients to make your Polar Bear Cookies:
- For the Cookies:
- 2 ¾ cups all-purpose flour
- 1 teaspoon baking powder
- ½ teaspoon baking soda
- ½ teaspoon salt
- 1 cup unsalted butter, softened
- 1 cup granulated sugar
- 1 large egg
- 1 teaspoon vanilla extract
- For Decorating:
- 12 oz white chocolate chips or candy melts
- Mini marshmallows (for ears)
- Mini chocolate chips (for eyes)
- Black candy pearls or black gel icing (for noses)
Ingredient Highlights
- White Chocolate: Provides a smooth, sweet coating for a frosty, polar bear look.
- Mini Marshmallows: Create cute, fluffy ears that are perfectly edible.
- Black Candy Pearls: Add a touch of detail for the polar bear noses, completing their adorable faces.
Step-by-Step Instructions


Here’s how to make Polar Bear Cookies:
Make the Cookie Dough:
- Mix Dry Ingredients: In a medium bowl, whisk together the flour, baking powder, baking soda, and salt. Set aside.
- Cream Butter and Sugar: In a large mixing bowl, beat the softened butter and granulated sugar with an electric mixer until light and fluffy, about 2-3 minutes.
- Add Egg and Vanilla: Mix in the egg and vanilla extract, beating until fully combined.
- Combine Wet and Dry Ingredients: Gradually add the dry ingredients to the wet mixture, mixing on low speed until a soft dough forms.
Chill and Roll the Dough:
- Chill the Dough: Wrap the dough in plastic wrap and refrigerate for 30 minutes to make it easier to handle.
- Roll and Cut Shapes: Roll out the dough on a lightly floured surface to about ¼-inch thickness. Use a round cookie cutter to cut out circles for the polar bear faces.
Bake the Cookies:
- Prepare for Baking: Preheat the oven to 350°F (175°C) and line baking sheets with parchment paper.
- Bake: Place the cookies on the prepared baking sheets and bake for 10-12 minutes, or until the edges are lightly golden. Let the cookies cool completely on a wire rack.
Decorate the Cookies:
- Melt the White Chocolate: In a microwave-safe bowl, melt the white chocolate chips in 20-second intervals, stirring until smooth.
- Dip the Cookies: Dip the top of each cookie into the melted white chocolate, letting the excess drip off. Place on parchment paper to set.
- Add the Decorations:
- Attach mini marshmallows for ears while the chocolate is still wet.
- Add mini chocolate chips for eyes.
- Use black candy pearls or gel icing for the nose.
Let Them Set:
- Cool Completely: Allow the decorated cookies to set at room temperature or in the refrigerator until the chocolate hardens.
How to Serve Polar Bear Cookies
Polar Bear Cookies are versatile and can be served in creative ways:
- On a Winter Dessert Table: Add them to a themed dessert spread for extra charm.
- In Gift Boxes: Package them in clear boxes with festive ribbons for holiday gifts.
- With Hot Cocoa: Serve alongside a warm cup of cocoa or coffee for a cozy treat.
- As Party Favors: Wrap individually for adorable party favors at winter-themed events.
- As a Kid’s Activity: Let children decorate their own polar bears for a fun and interactive experience.
Additional Tips for Polar Bear Cookies
Here are some tips to ensure your Polar Bear Cookies turn out perfectly:
- Keep the Dough Cold: Chilling the dough makes it easier to handle and helps the cookies keep their shape.
- Work Quickly with Chocolate: Melted white chocolate sets quickly, so have all your decorations ready before dipping the cookies.
- Use Piping Bags for Details: If using gel icing for the noses, a piping bag helps achieve clean, precise designs.
- Get Creative: Add a scarf detail with colored icing or sprinkle edible glitter for extra festive flair.
- Store Properly: Keep cookies in an airtight container at room temperature for up to a week.
Recipe Variations for Polar Bear Cookies
Here are 10 fun ways to customize your Polar Bear Cookies:
- Chocolate Polar Bears: Use milk or dark chocolate instead of white for a unique look.
- Flavored Cookies: Add a hint of peppermint extract to the dough for a festive twist.
- Snowy Polar Bears: Sprinkle shredded coconut over the wet white chocolate for a snowy effect.
- Mini Polar Bears: Make bite-sized cookies using smaller cookie cutters.
- Gluten-Free Version: Substitute a gluten-free flour blend to make them suitable for everyone.
- Colored Ears: Use mini candy-coated chocolates instead of marshmallows for colorful ears.
- Polar Bear Families: Create different sizes of cookies to make a “family” of polar bears.
- Sparkling Bears: Add edible glitter to the white chocolate for a shimmering finish.
- Vegan Polar Bears: Use dairy-free chocolate and egg substitutes for a vegan version.
- Holiday-Themed Bears: Decorate with red and green candies for a Christmas touch.
Freezing and Storage
- Freezing: Freeze undecorated cookies in an airtight container for up to 3 months. Thaw before decorating.
- Storage: Store decorated cookies in a single layer in an airtight container at room temperature for up to 1 week.
Special Equipment for Polar Bear Cookies
Here are some items that make preparing Polar Bear Cookies easier:
- Electric Mixer: For creaming butter and sugar efficiently.
- Round Cookie Cutter: To create the perfect shape for polar bear faces.
- Parchment Paper: Ensures the cookies don’t stick to the baking sheets.
- Microwave-Safe Bowl: For melting the white chocolate.
- Cooling Rack: Helps cookies cool evenly after baking.
- Piping Bags: For precise detailing with icing or chocolate.
- Offset Spatula: Useful for smoothing melted chocolate on the cookies.
- Decorating Tweezers: For placing tiny details like candy pearls.
- Rolling Pin: To roll out the cookie dough evenly.
- Cookie Storage Containers: Keeps your decorated cookies fresh and safe.
FAQ Section for Polar Bear Cookies
- Can I make the dough ahead of time?
Yes, you can prepare the dough up to 3 days in advance and store it in the fridge until ready to use. - Can I use store-bought cookies?
Absolutely! You can decorate pre-made cookies for a quicker version of this recipe. - What if I don’t have white chocolate?
Candy melts are a great substitute for white chocolate. - How long does it take for the chocolate to set?
The chocolate typically sets within 15-20 minutes at room temperature or faster in the fridge. - Can I use colored icing for the decorations?
Yes, feel free to add extra color and detail with different icing shades. - What’s the best way to store these cookies?
Keep them in an airtight container at room temperature, separated by parchment paper to prevent sticking. - Can I freeze decorated cookies?
It’s best to freeze the cookies before decorating to maintain their appearance. - Are these cookies suitable for gifting?
Yes, they’re perfect for gifting, especially when packaged in festive wrapping. - How can I make the cookies softer?
Bake them for a minute or two less to keep them soft and chewy. - Can I use a different shape for the cookies?
Of course! You can create other animal shapes or even snowflakes for variety.
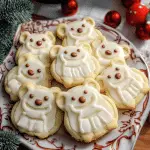
Polar Bear Cookies
- Prep Time: 1 hour
- Total Time: 1 hour 30 minutes
Ingredients
Gather these ingredients to make your Polar Bear Cookies:
- For the Cookies:
- 2 ¾ cups all-purpose flour
- 1 teaspoon baking powder
- ½ teaspoon baking soda
- ½ teaspoon salt
- 1 cup unsalted butter, softened
- 1 cup granulated sugar
- 1 large egg
- 1 teaspoon vanilla extract
- For Decorating:
- 12 oz white chocolate chips or candy melts
- Mini marshmallows (for ears)
- Mini chocolate chips (for eyes)
- Black candy pearls or black gel icing (for noses)
Instructions
Make the Cookie Dough:
- Mix Dry Ingredients: In a medium bowl, whisk together the flour, baking powder, baking soda, and salt. Set aside.
- Cream Butter and Sugar: In a large mixing bowl, beat the softened butter and granulated sugar with an electric mixer until light and fluffy, about 2-3 minutes.
- Add Egg and Vanilla: Mix in the egg and vanilla extract, beating until fully combined.
- Combine Wet and Dry Ingredients: Gradually add the dry ingredients to the wet mixture, mixing on low speed until a soft dough forms.
Chill and Roll the Dough:
- Chill the Dough: Wrap the dough in plastic wrap and refrigerate for 30 minutes to make it easier to handle.
- Roll and Cut Shapes: Roll out the dough on a lightly floured surface to about ¼-inch thickness. Use a round cookie cutter to cut out circles for the polar bear faces.
Bake the Cookies:
- Prepare for Baking: Preheat the oven to 350°F (175°C) and line baking sheets with parchment paper.
- Bake: Place the cookies on the prepared baking sheets and bake for 10-12 minutes, or until the edges are lightly golden. Let the cookies cool completely on a wire rack.
Decorate the Cookies:
- Melt the White Chocolate: In a microwave-safe bowl, melt the white chocolate chips in 20-second intervals, stirring until smooth.
- Dip the Cookies: Dip the top of each cookie into the melted white chocolate, letting the excess drip off. Place on parchment paper to set.
- Add the Decorations:
- Attach mini marshmallows for ears while the chocolate is still wet.
- Add mini chocolate chips for eyes.
- Use black candy pearls or gel icing for the nose.
Let Them Set:
- Cool Completely: Allow the decorated cookies to set at room temperature or in the refrigerator until the chocolate hardens.
Nutrition
- Serving Size: 24 cookies
- Calories: 180-200 kcal
- Fat: 8g
- Carbohydrates: 28g
- Protein: 2g
Conclusion
Polar Bear Cookies are the ultimate combination of fun, flavor, and festive cheer. These adorable treats feature a soft, sweet cookie base decorated to look like charming polar bears, making them a standout at any winter celebration. Whether it’s a family gathering, a holiday party, or just a cozy afternoon in the kitchen, these cookies bring joy to every occasion.
Their customizable designs and delightful flavor make them perfect for bakers of all ages. You can get creative with decorations, experimenting with icing colors and candy accents to craft unique polar bear faces. Plus, the simple recipe makes them easy to whip up for last-minute holiday fun.
Give these Polar Bear Cookies a try, and let them add a touch of whimsy to your winter festivities. I can’t wait to see how your polar bear creations turn out! Don’t forget to snap a photo and tag me on Instagram—I love seeing your festive bakes! Feel free to leave a comment about your experience or share your decorating tips. Happy baking!


