

No-Bake Orange Creamsicle Cheesecake is an incredible dessert that combines the delightful flavors of orange and cream. This sweet treat captures the nostalgic essence of a classic creamsicle, sure to transport you straight to sun-soaked days. With a smooth and creamy texture, each bite of this cheesecake is like a burst of sunshine on your palate. It’s perfect for summer gatherings, weekday indulging, or simply satisfying your sweet tooth. Whether you’re sharing it with friends, family, or treating yourself, this dessert promises smiles all around.
If you love orange-flavored desserts, this No-Bake Orange Creamsicle Cheesecake is bound to become your new favorite. The rich creaminess, complemented by refreshing orange zest, creates a perfect balance of flavors. This dessert not only satisfies cravings but also boasts a beautiful presentation, making it elegant enough for special occasions. In this guide, we’ll explore the recipe, preparation details, serving suggestions, and tips to ensure your cheesecake turns out wonderfully every time.
Whether you’re a novice baker or a seasoned pro, the No-Bake Orange Creamsicle Cheesecake is incredibly easy to make. With minimal effort, you can whip up this delicious dessert without turning on your oven. Prepare to impress your guests with a dessert that tastes as good as it looks. Let’s jump into why you’ll adore this recipe, its components, and how to make it perfectly.
Why You’ll Love This Recipe
There are several reasons why No-Bake Orange Creamsicle Cheesecake will capture your heart and taste buds. Here are some standout features that make this cheesecake so irresistible:
1. Effortless Preparation – The no-bake process is simple and quick, requiring just a few common ingredients.
2. Vibrant Flavors – The combination of orange juice, zest, and cream cheese creates a deliciously refreshing dessert.
3. Versatile Ingredients – Tailor the recipe to suit your preferences, whether that means adjusting sweetness or adding toppings.
4. Perfect for Any Occasion – This cheesecake works beautifully for birthdays, summer parties, or simply as a tasty weeknight treat.
5. Textural Harmony – The creamy filling paired with a crunchy crust creates a wonderful contrast that is sure to please.
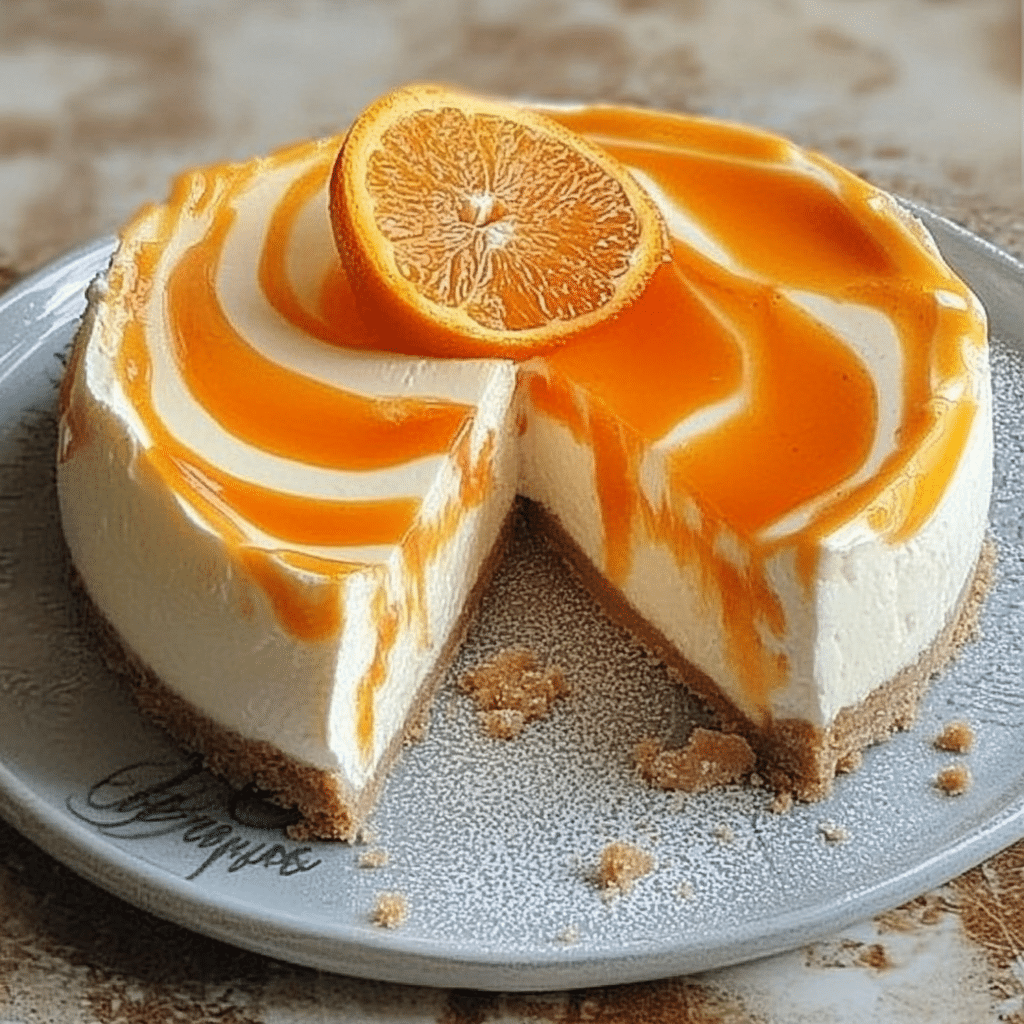
6. Stunning Presentation – The bright orange hue and creamy texture make for a visually appealing dessert that will wow your guests.
By choosing this recipe, you’re not only opting for something scrumptious, but you’re also ensuring an enjoyable baking experience. Each slice of this cheesecake offers a delightful taste of nostalgia, making it a perfect sweet treat for celebrations or simple indulgence.
Preparation and Cooking Time
Crafting the No-Bake Orange Creamsicle Cheesecake requires a bit of planning. You’ll need to allow time for the cheesecake to set in the refrigerator. Here’s a detailed breakdown of how long it typically takes:
– Preparation Time: 20 minutes
– Chilling Time: 4-5 hours (or overnight)
– Total Time: 4-5 hours and 20 minutes (or overnight with chilling)
The chilling time is crucial as it allows the cheesecake to firm up properly. Take this into account when planning to serve your dessert to ensure it’s perfectly set.
Ingredients
– 1 ½ cups graham cracker crumbs
– ½ cup unsalted butter, melted
– 1 cup powdered sugar
– 2 (8-ounce) packages cream cheese, softened
– 1 cup heavy whipping cream
– ½ cup fresh orange juice
– Zest of 2 oranges
– 1 teaspoon vanilla extract
– 1 tablespoon gelatin (optional, for firmer texture)
– Orange slices and zest for garnish (optional)
Step-by-Step Instructions

Here’s how to create the No-Bake Orange Creamsicle Cheesecake:
1. Prepare the Crust:
– In a medium bowl, combine graham cracker crumbs and melted butter.
– Press the mixture evenly into the bottom of a 9-inch springform pan to form the crust.
2. Make the Cheesecake Filling:
– In a large mixing bowl, use an electric mixer to beat the softened cream cheese until smooth and creamy.
– Gradually add powdered sugar and mix until fully combined.
– Stir in fresh orange juice, orange zest, and vanilla extract until smooth.
3. Whip the Cream:
– In a separate bowl, whip heavy cream until stiff peaks form.
– Gently fold the whipped cream into the cream cheese mixture until just combined. Be careful not to deflate the whipped cream.
4. Optional Gelatin Step:
– If desired, dissolve gelatin in a small bowl with 2 tablespoons of warm water (not boiling).
– Allow it to sit for a minute, then stir this mixture into the cream cheese filling for a firmer cheesecake.
5. Combine Mixtures:
– Pour the cream cheese filling over the prepared crust, smoothing the top with a spatula.
– Tap the pan gently on the counter to eliminate air bubbles.
6. Chill the Cheesecake:
– Cover the springform pan with plastic wrap or foil.
– Place it in the refrigerator and allow to chill for at least 4-5 hours, or preferably overnight.
7. Release from Pan:
– After setting, gently remove the springform pan, running a knife around the edge if necessary.
8. Garnish:
– Decorate the cheesecake with fresh orange slices and additional zest if desired.
How to Serve
Serving the No-Bake Orange Creamsicle Cheesecake requires a bit of thought to elevate the experience:
1. Presentation Matters:
– Use a fancy cake stand or a decorative plate to highlight the cheesecake’s vibrant colors.
2. Ideal Slice Size:
– Serve slices that are generous yet not overwhelming, encouraging guests to go back for seconds without feeling too full.
3. Accompanying Flavors:
– Consider pairing with fresh whipped cream, chocolate drizzle, or a scoop of vanilla ice cream for a delightful contrast in flavors.
4. Drinks to Pair:
– Serve with iced tea, lemonade, or champagne to complement the refreshing orange flavor.
By focusing on these details, you’ll ensure a memorable serving of No-Bake Orange Creamsicle Cheesecake that impresses everyone at your gathering. Enjoy the delight in each bite!
Additional Tips
– Use Fresh Ingredients: For the best flavor, opt for fresh oranges and cream cheese. Fresh ingredients elevate the overall taste of the No-Bake Orange Creamsicle Cheesecake.
– Consider Citrus Alternatives: If you want to experiment, feel free to mix in other citrus flavors. Grapefruit or tangerine can provide a unique twist to the traditional orange flavor.
– Make a Mini Version: If you’re short on time or want a smaller treat, consider making mini cheesecakes in muffin pans. Adjust the chilling time accordingly.
Recipe Variation
Feel free to customize your cheesecake! Here are a few variations to consider:
1. Chocolate Orange: Add cocoa powder to the filling or fold in mini chocolate chips to create a delicious chocolate-orange fusion.
2. No-Crust Version: For a low-carb option, skip the graham cracker crust entirely and serve the cheesecake in individual cups.
3. Swirled Topping: Layer in some orange marmalade on top of the cheesecake before chilling for a beautiful swirled effect.
Freezing and Storage
– Storage: Once prepared, keep the cheesecake covered in the refrigerator. It will maintain its freshness for about 5 days.
– Freezing: You can freeze this cheesecake for up to 2-3 months. Slice it into portions and wrap each slice in plastic wrap and foil to prevent freezer burn.
Special Equipment
To create the No-Bake Orange Creamsicle Cheesecake, you’ll need a few essential tools:
– Mixing bowls
– Electric mixer or stand mixer for whipping cream
– Spatula
– 9-inch springform pan for easy removal
– Measuring cups and spoons for accuracy
Frequently Asked Questions
Can I use bottled orange juice instead of fresh?
While you can use bottled orange juice, fresh juice provides the best flavor.
How long should I chill the cheesecake?
Chilling for at least 4-5 hours is recommended. For best results, overnight chilling is ideal.
Can I use a different type of crust?
Absolutely! You can use an Oreo crust, a gluten-free graham cracker crust, or even almond flour for a low-carb option.
What if my cheesecake is too soft?
If your cheesecake turns out too soft, try adding gelatin next time, or chill it longer to help it set.
Is this dessert suitable for kids?
Yes! The No-Bake Orange Creamsicle Cheesecake is a kid-friendly dessert that’s sure to please with its sweet and citrus flavors.
Conclusion
The No-Bake Orange Creamsicle Cheesecake is a delightful, easy-to-make dessert that captures the essence of summer in each creamy bite. Its vibrant flavors and beautiful presentation make it perfect for any occasion, be it a festive gathering or a quiet night in. By following the provided tips and variations, you can customize the cheesecake to fit your preferences while ensuring it becomes a fan favorite. Enjoy sharing this delightful treat with friends and family—each slice is a taste of nostalgia that promises to leave everyone smiling!
No-Bake Orange Creamsicle Cheesecake: An Amazing Ultimate Recipe

- Prep Time: 15 minutes
- Cook Time: –
- Total Time: 0 hours
Ingredients
– 1 ½ cups graham cracker crumbs
– ½ cup unsalted butter, melted
– 1 cup powdered sugar
– 2 (8-ounce) packages cream cheese, softened
– 1 cup heavy whipping cream
– ½ cup fresh orange juice
– Zest of 2 oranges
– 1 teaspoon vanilla extract
– 1 tablespoon gelatin (optional, for firmer texture)
– Orange slices and zest for garnish (optional)
Instructions
Here’s how to create the No-Bake Orange Creamsicle Cheesecake:
1. Prepare the Crust:
– In a medium bowl, combine graham cracker crumbs and melted butter.
– Press the mixture evenly into the bottom of a 9-inch springform pan to form the crust.
2. Make the Cheesecake Filling:
– In a large mixing bowl, use an electric mixer to beat the softened cream cheese until smooth and creamy.
– Gradually add powdered sugar and mix until fully combined.
– Stir in fresh orange juice, orange zest, and vanilla extract until smooth.
3. Whip the Cream:
– In a separate bowl, whip heavy cream until stiff peaks form.
– Gently fold the whipped cream into the cream cheese mixture until just combined. Be careful not to deflate the whipped cream.
4. Optional Gelatin Step:
– If desired, dissolve gelatin in a small bowl with 2 tablespoons of warm water (not boiling).
– Allow it to sit for a minute, then stir this mixture into the cream cheese filling for a firmer cheesecake.
5. Combine Mixtures:
– Pour the cream cheese filling over the prepared crust, smoothing the top with a spatula.
– Tap the pan gently on the counter to eliminate air bubbles.
6. Chill the Cheesecake:
– Cover the springform pan with plastic wrap or foil.
– Place it in the refrigerator and allow to chill for at least 4-5 hours, or preferably overnight.
7. Release from Pan:
– After setting, gently remove the springform pan, running a knife around the edge if necessary.
8. Garnish:
– Decorate the cheesecake with fresh orange slices and additional zest if desired.
Nutrition
- Serving Size: 10
- Calories: 350 kcal
- Fat: 25g
- Protein: 5g


