
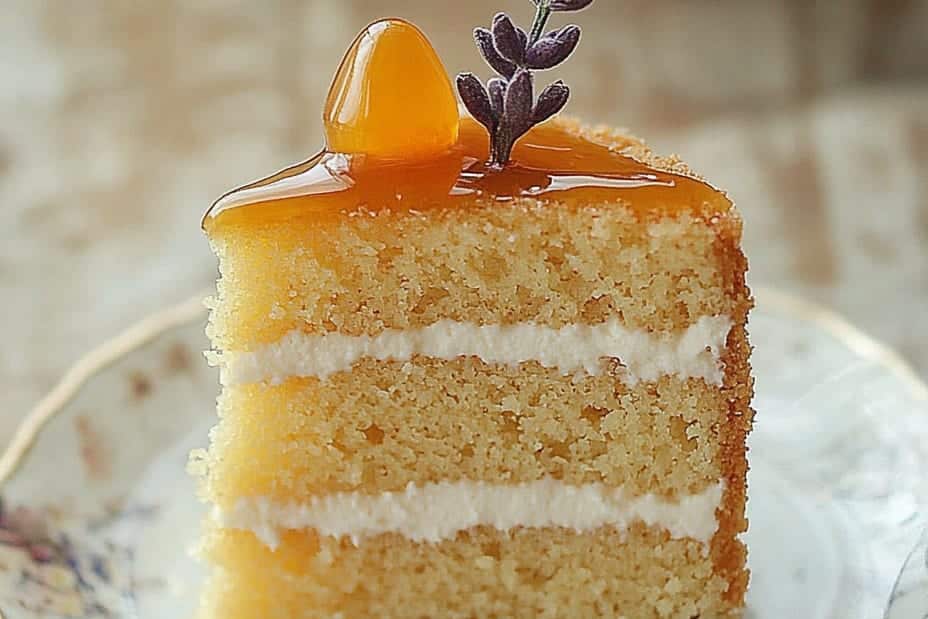

Russian Honey Cake is an incredible dessert that showcases the beauty of layering flavors and textures. This delectable cake, known as Medovik, features soft honey-infused layers and a creamy filling that is simply irresistible. Each bite unveils a melange of richness, sweetness, and a touch of nostalgia, creating a multi-layered experience that has captivated many hearts.
From special occasions to casual gatherings, Russian Honey Cake is a genuine showstopper. This cake’s complex yet comforting flavors allow it to stand out in any dessert lineup. By taking the time to prepare this incredibly layered delight, you provide your loved ones with a taste of tradition wrapped in sweetness.
In this guide, we will delve into why this recipe is cherished, the steps to create your own masterpiece, and helpful serving suggestions that will elevate your dessert to new heights. Whether you’re a seasoned baker or just beginning, the magic of Russian Honey Cake is approachable and rewarding!
Why You’ll Love This Recipe
Russian Honey Cake offers numerous reasons to love it:
1. Delicious Honey Flavor: The honey adds a beautiful depth and flavor that makes it unique compared to standard cakes.
2. Layered Texture: The multiple layers create not only visual appeal but also a delightful textural experience.
3. Customizable Filling: You can tweak the cream filling to your preferences, adding things like berries or nuts for a personal twist.
4. A True Showpiece: Its stunning layers and rich color make it a conversation starter at any gathering.
5. Rich Cultural Heritage: This cake carries a traditional Russian legacy, giving you a taste of another culture.
6. Perfect for Any Occasion: From birthdays to holiday festivities, this cake fits right in.
7. Easy to Follow Steps: The recipe allows bakers of all skill levels to achieve great results.
With these compelling reasons, it’s easy to see why so many people fall in love with Russian Honey Cake.
Preparation and Cooking Time
Preparing Russian Honey Cake will take approximately 2 hours, allowing for a delicious result that’s well worth the wait. Here’s a breakdown of the time required:
– Preparation Time: 45 minutes
– Cooking Time: 40 minutes
– Cooling Time: 30 minutes
– Assembly Time: 15 minutes
Overall, you can expect about 2 hours from start to finish. Plan your time accordingly to enjoy the creative process!
Ingredients
– For the Cake Layers:
– 3 cups all-purpose flour
– 1 cup granulated sugar
– ¾ cup honey
– 1 teaspoon baking soda
– 1 teaspoon vanilla extract
– 2 large eggs
– ½ cup unsalted butter (softened)
– For the Cream Filling:
– 2 cups sour cream (or heavy cream)
– 1 cup powdered sugar
– 1 teaspoon vanilla extract
– Optional Garnish:
– Crushed nuts (walnuts or almonds)
– Fresh berries
Step-by-Step Instructions

Creating a perfect Russian Honey Cake can be straightforward when you follow these clear steps:
1. Preheat the Oven: Set your oven to 350°F (175°C) and grease two 9-inch round cake pans.
2. Make Honey Mixture: In a saucepan over low heat, combine honey, sugar, and butter. Stir until melted and smooth.
3. Combine Ingredients: Remove the mixture from heat and allow it to cool slightly. Add eggs and vanilla, mixing well.
4. Add Dry Ingredients: In a separate bowl, whisk together flour and baking soda. Gradually add this to the honey mixture, mixing until a dough forms.
5. Divide the Dough: Split the dough into 7 equal portions. Roll out each portion into thin layers (about 1/8-inch thick).
6. Bake the Layers: Place each layer on a parchment-lined baking sheet and bake for 5-7 minutes or until lightly golden. Allow layers to cool.
7. Make Cream Filling: In a mixing bowl, whisk together sour cream, powdered sugar, and vanilla extract until smooth.
8. Assemble the Cake: On a serving platter, layer the baked honey layers, spreading a thin layer of cream filling between each layer. Continue until all layers are stacked.
9. Chill: Place the assembled cake in the refrigerator for at least 2 hours to firm up.
10. Garnish and Serve: Before serving, garnish with crushed nuts or fresh berries if desired.
By following these steps, you’ll create an amazing Russian Honey Cake that delivers on flavor and elegance.
How to Serve
To ensure your Russian Honey Cake makes a lasting impression, consider the following tips for serving:
1. Presentation: Serve the cake on a beautiful cake stand to highlight its layers. A simple garnish can add sophistication.
2. Accompaniments: Pair slices with fresh berries, whipped cream, or a scoop of ice cream to enhance the experience.
3. Slice Size: Aim for generous but manageable slices, inviting guests to help themselves to seconds.
4. Beverage Pairing: Serve with a cup of aromatic tea or coffee for a cozy feel, or a sweet dessert wine for an elevated touch.
By thoughtfully considering how to serve Russian Honey Cake, you create a delightful experience that is sure to be remembered by your guests. Whether you’re celebrating a special occasion or indulging in a sweet moment, this incredible cake will shine!
Additional Tips
– Use Fresh Ingredients: Opt for farm-fresh eggs and high-quality honey to enhance the overall flavor of your Russian Honey Cake.
– Allow Layers to Cool Completely: Ensure that each cake layer is completely cool before stacking; this prevents melting of the cream filling.
– Layer Cream Generously: Don’t skimp on the cream filling between the layers; this adds moisture and richness to the cake.
– Let the Cake Rest: For the best flavor, allow the assembled cake to chill in the refrigerator overnight. This allows the flavors to meld beautifully.
– Experiment with Flavors: Consider adding a hint of lemon zest or spices like cinnamon to your cream filling for added depth.
Recipe Variation
Feel free to customize your Russian Honey Cake with these delicious variations:
1. Chocolate Honey Cake: Incorporate cocoa powder into the cake layers for a chocolate twist on the traditional recipe.
2. Berry Bliss: Mix in fresh or frozen berries with the cream filling for a fruity and refreshing contrast.
3. Nutty Delight: Fold crushed nuts into the cream filling for a crunchy texture and rich flavor.
4. Seasonal Spice: Add ground ginger or nutmeg to the batter during the mixing process for a warm, spiced flavor.
5. Alternative Sweeteners: For a healthier take, swap out granulated sugar for a natural sweetener like honey or maple syrup.
Freezing and Storage
– Storage: Keep any leftover cake covered in an airtight container in the refrigerator. It should stay fresh for 4-5 days.
– Freezing: To freeze, slice the cake into portions and wrap each slice tightly in plastic wrap. Place them in a freezer-safe bag. The cake can be frozen for up to 3 months.
– Thawing: To enjoy again, simply remove a slice from the freezer and let it thaw in the refrigerator for a few hours before serving.
Special Equipment
To prepare your Russian Honey Cake, you will need the following essential tools:
– Mixing Bowls: These are necessary for combining ingredients easily.
– Rolling Pin: Use this to roll out the dough into even layers.
– Baking Sheets: Essential for baking the individual cake layers.
– Parchment Paper: Line your baking sheets to prevent sticking.
– Electric Mixer: A handheld mixer makes whipping the cream filling a breeze.
– Cake Stand or Platter: To present your beautifully layered cake elegantly.
Frequently Asked Questions
Can I use a different type of flour?
Yes! You can experiment with cake flour or a gluten-free flour blend for a different texture and dietary preferences.
How do I know when the layers are done baking?
Keep an eye on the layers; they should be lightly golden and spring back when gently pressed.
Can I use store-bought cream instead of making my own?
Absolutely! Store-bought whipped cream can be a convenient time-saver if you’re in a pinch.
Is it necessary to chill the cake?
Chilling is recommended for the best slice—the chilling time allows the layers to set properly and the flavors to develop.
Can this cake be made as a single-layer cake?
Yes, you can make a simplified version as a single-layer cake, though traditional Medovik is known for its multiple layers.
Conclusion
Russian Honey Cake is not only a decadent dessert but also a celebration of rich traditions and flavors. With its exquisite layers and creamy filling, each slice provides a memorable experience. Whether served at festive gatherings or family celebrations, this cake will surely impress and delight everyone who tries it. So roll up your sleeves, follow the guidelines, and share the joy of this sweet layered symphony with your loved ones. Baking has never been so rewarding!
Russian Honey Cake: An Incredible 7-Layer Symphony

- Prep Time: 15 minutes
- Cook Time: 40 minutes
- Total Time: 55 minutes
Ingredients
– For the Cake Layers:
– 3 cups all-purpose flour
– 1 cup granulated sugar
– ¾ cup honey
– 1 teaspoon baking soda
– 1 teaspoon vanilla extract
– 2 large eggs
– ½ cup unsalted butter (softened)
– For the Cream Filling:
– 2 cups sour cream (or heavy cream)
– 1 cup powdered sugar
– 1 teaspoon vanilla extract
– Optional Garnish:
– Crushed nuts (walnuts or almonds)
– Fresh berries
Instructions
Creating a perfect Russian Honey Cake can be straightforward when you follow these clear steps:
1. Preheat the Oven: Set your oven to 350°F (175°C) and grease two 9-inch round cake pans.
2. Make Honey Mixture: In a saucepan over low heat, combine honey, sugar, and butter. Stir until melted and smooth.
3. Combine Ingredients: Remove the mixture from heat and allow it to cool slightly. Add eggs and vanilla, mixing well.
4. Add Dry Ingredients: In a separate bowl, whisk together flour and baking soda. Gradually add this to the honey mixture, mixing until a dough forms.
5. Divide the Dough: Split the dough into 7 equal portions. Roll out each portion into thin layers (about 1/8-inch thick).
6. Bake the Layers: Place each layer on a parchment-lined baking sheet and bake for 5-7 minutes or until lightly golden. Allow layers to cool.
7. Make Cream Filling: In a mixing bowl, whisk together sour cream, powdered sugar, and vanilla extract until smooth.
8. Assemble the Cake: On a serving platter, layer the baked honey layers, spreading a thin layer of cream filling between each layer. Continue until all layers are stacked.
9. Chill: Place the assembled cake in the refrigerator for at least 2 hours to firm up.
10. Garnish and Serve: Before serving, garnish with crushed nuts or fresh berries if desired.
By following these steps, you’ll create an amazing Russian Honey Cake that delivers on flavor and elegance.
Nutrition
- Serving Size: 12 servings
- Calories: 350 kcal
- Fat: 15g
- Protein: 6g


